Configuring custom fields and forms in Halp is a powerful way to gather more information from your end-users and sort different types of requests. Once you set up your fields, check out this article on setting up your custom forms.
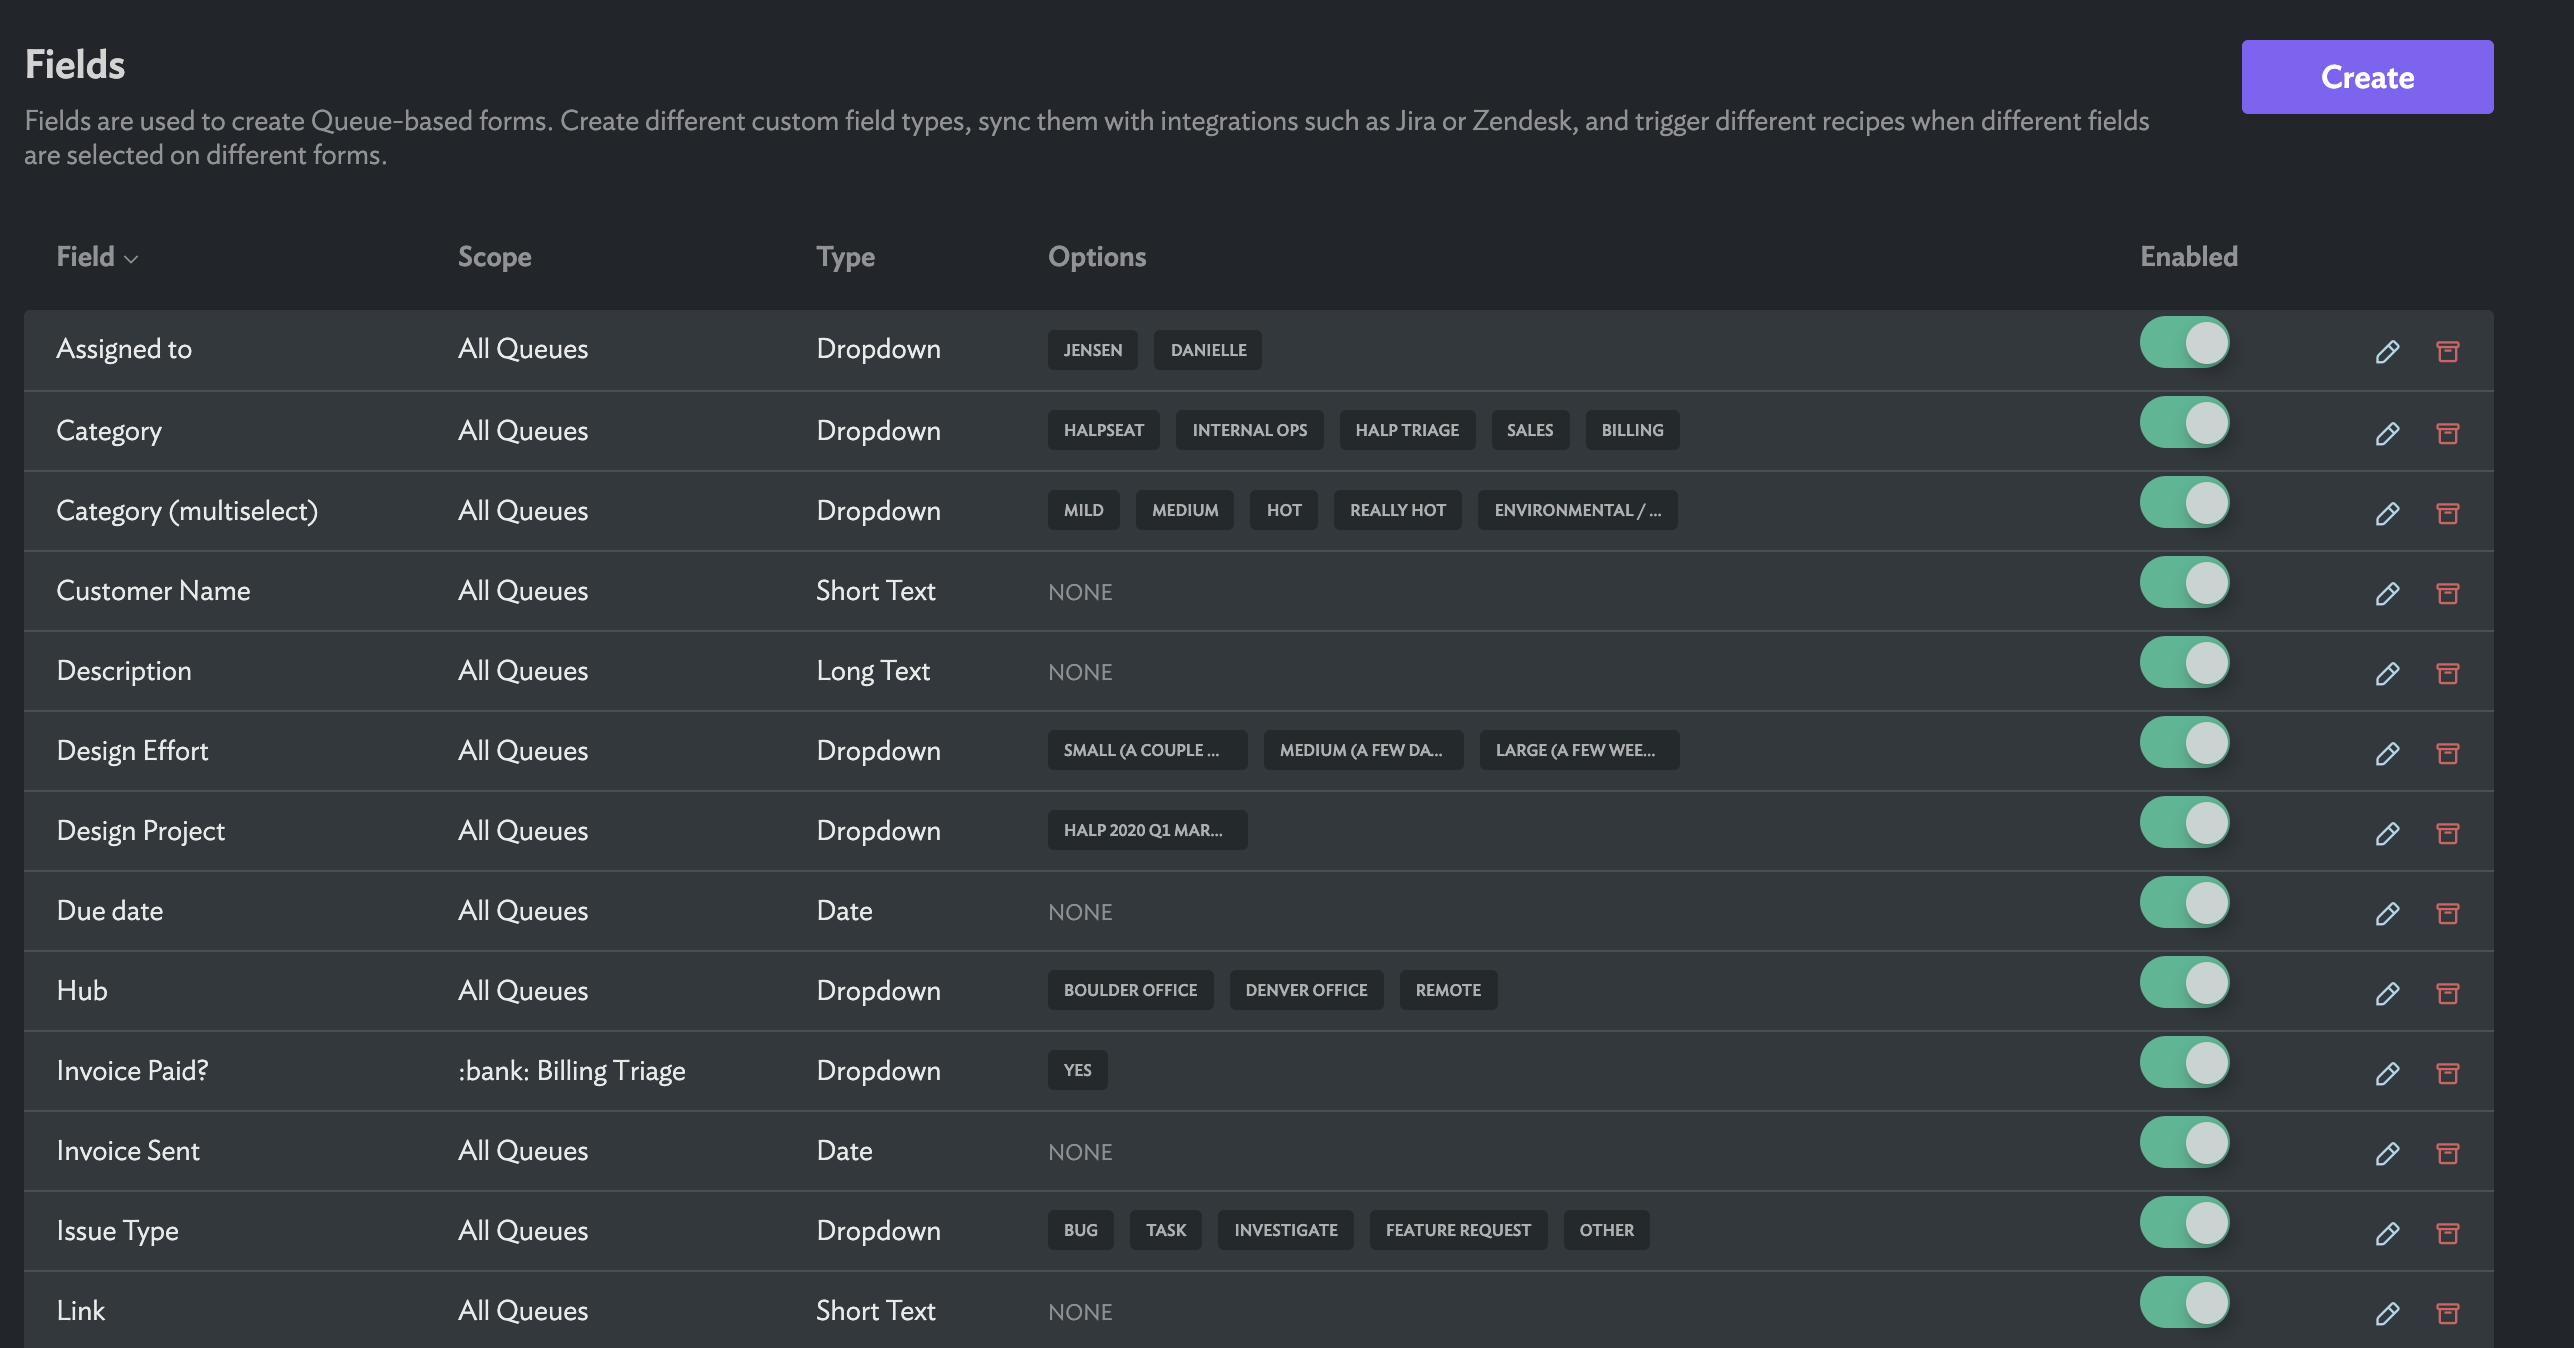
To begin setting up your custom fields, first navigate to Settings > Custom Fields in the web portal. Note: You will need to be an Admin to access the settings.
From here, you can create your custom fields by clicking the 'Add custom field' button. You can also create fields directly from your Queue settings.
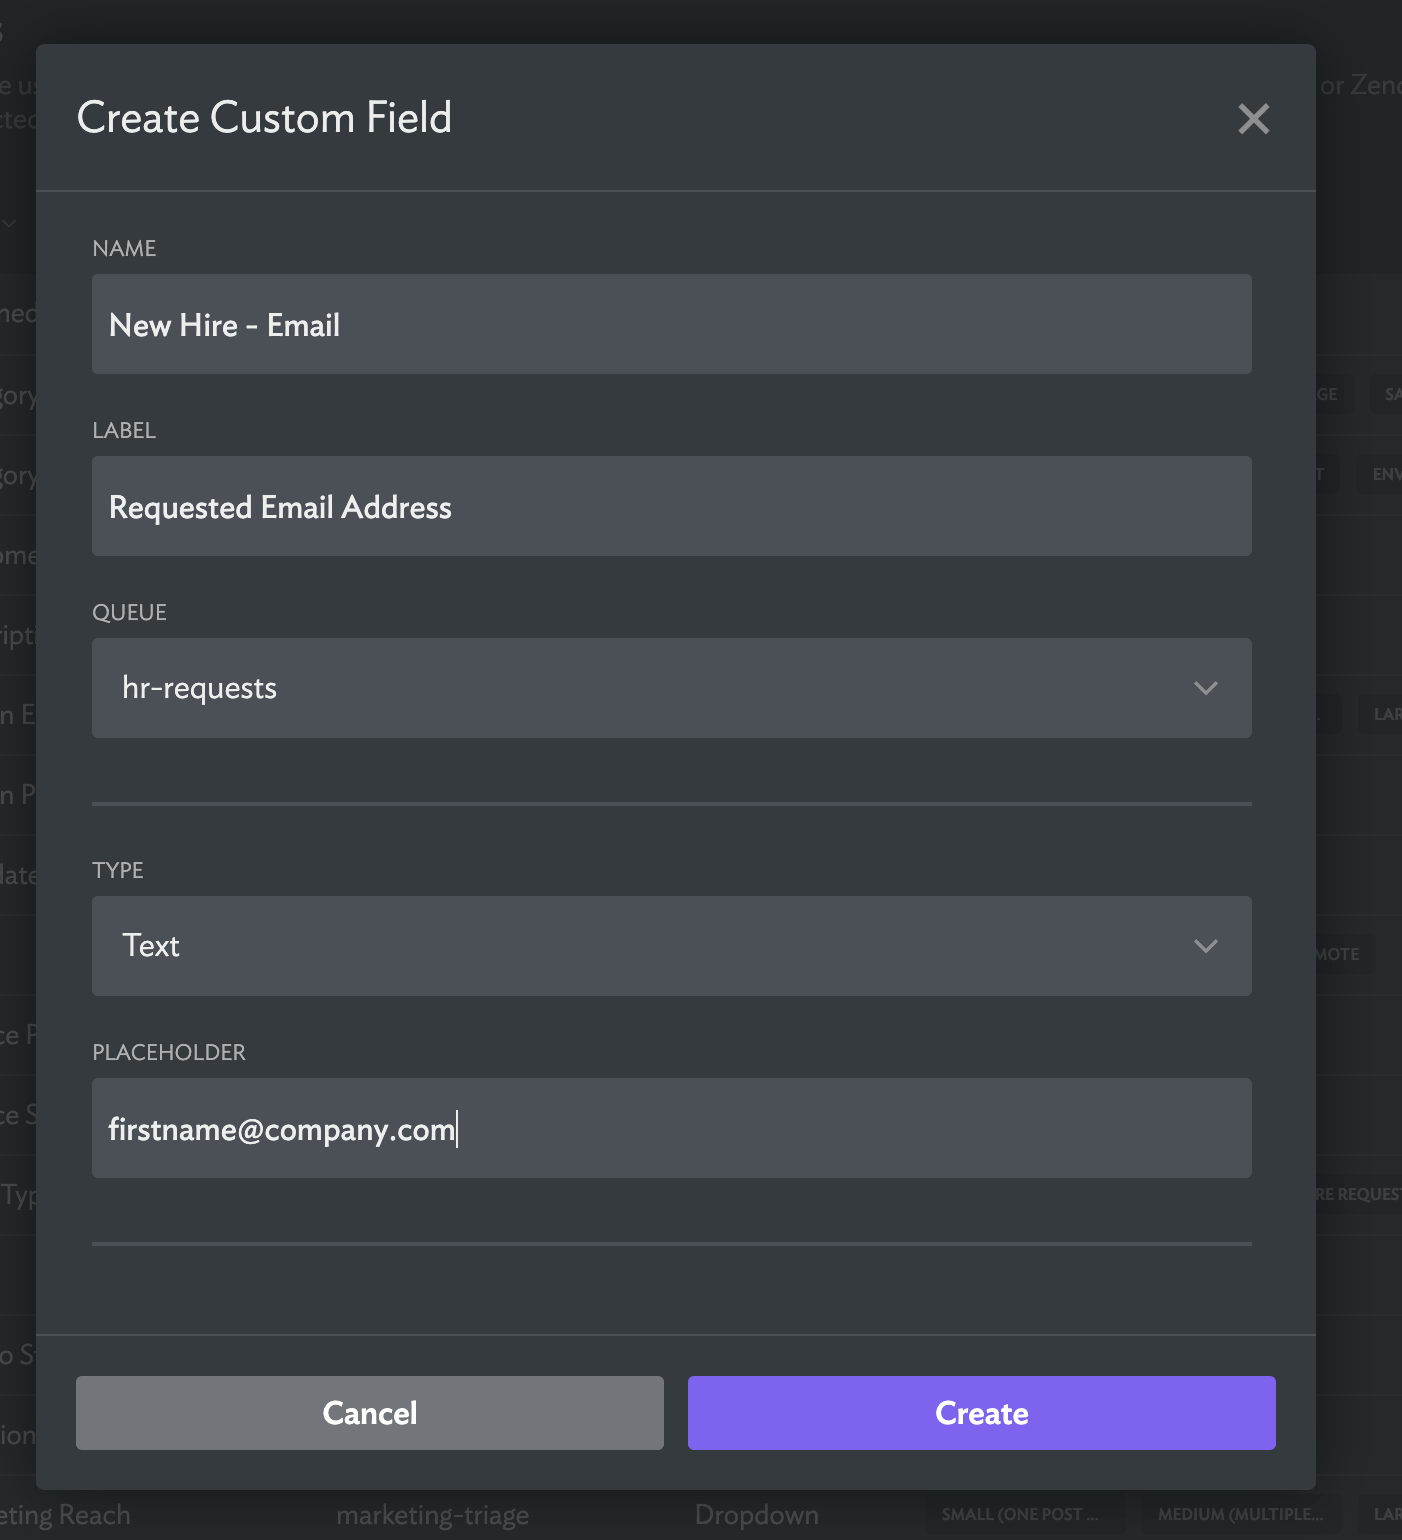
The pop up menu will prompt you to fill out required information to create the field. The 'Name' will be what you use to identify this field from within Halp. The 'Label' will be what is shown to the user when they fill out the form. You can also set a placeholder for Short or Long Text field types.
The Queue determines which Queue this field will be visible on to be added to forms in that Queue and editable on tickets. You can choose to make it visible on all Queues, or pick a specific Queue. Read more on how to route tickets to different Queues.
The five custom field types are:
Short Text - Best for gathering small amounts of information such as email addresses or names. Character limit of 150.
Long Text - Great for longer descriptions of issues. Character limit of 3000.
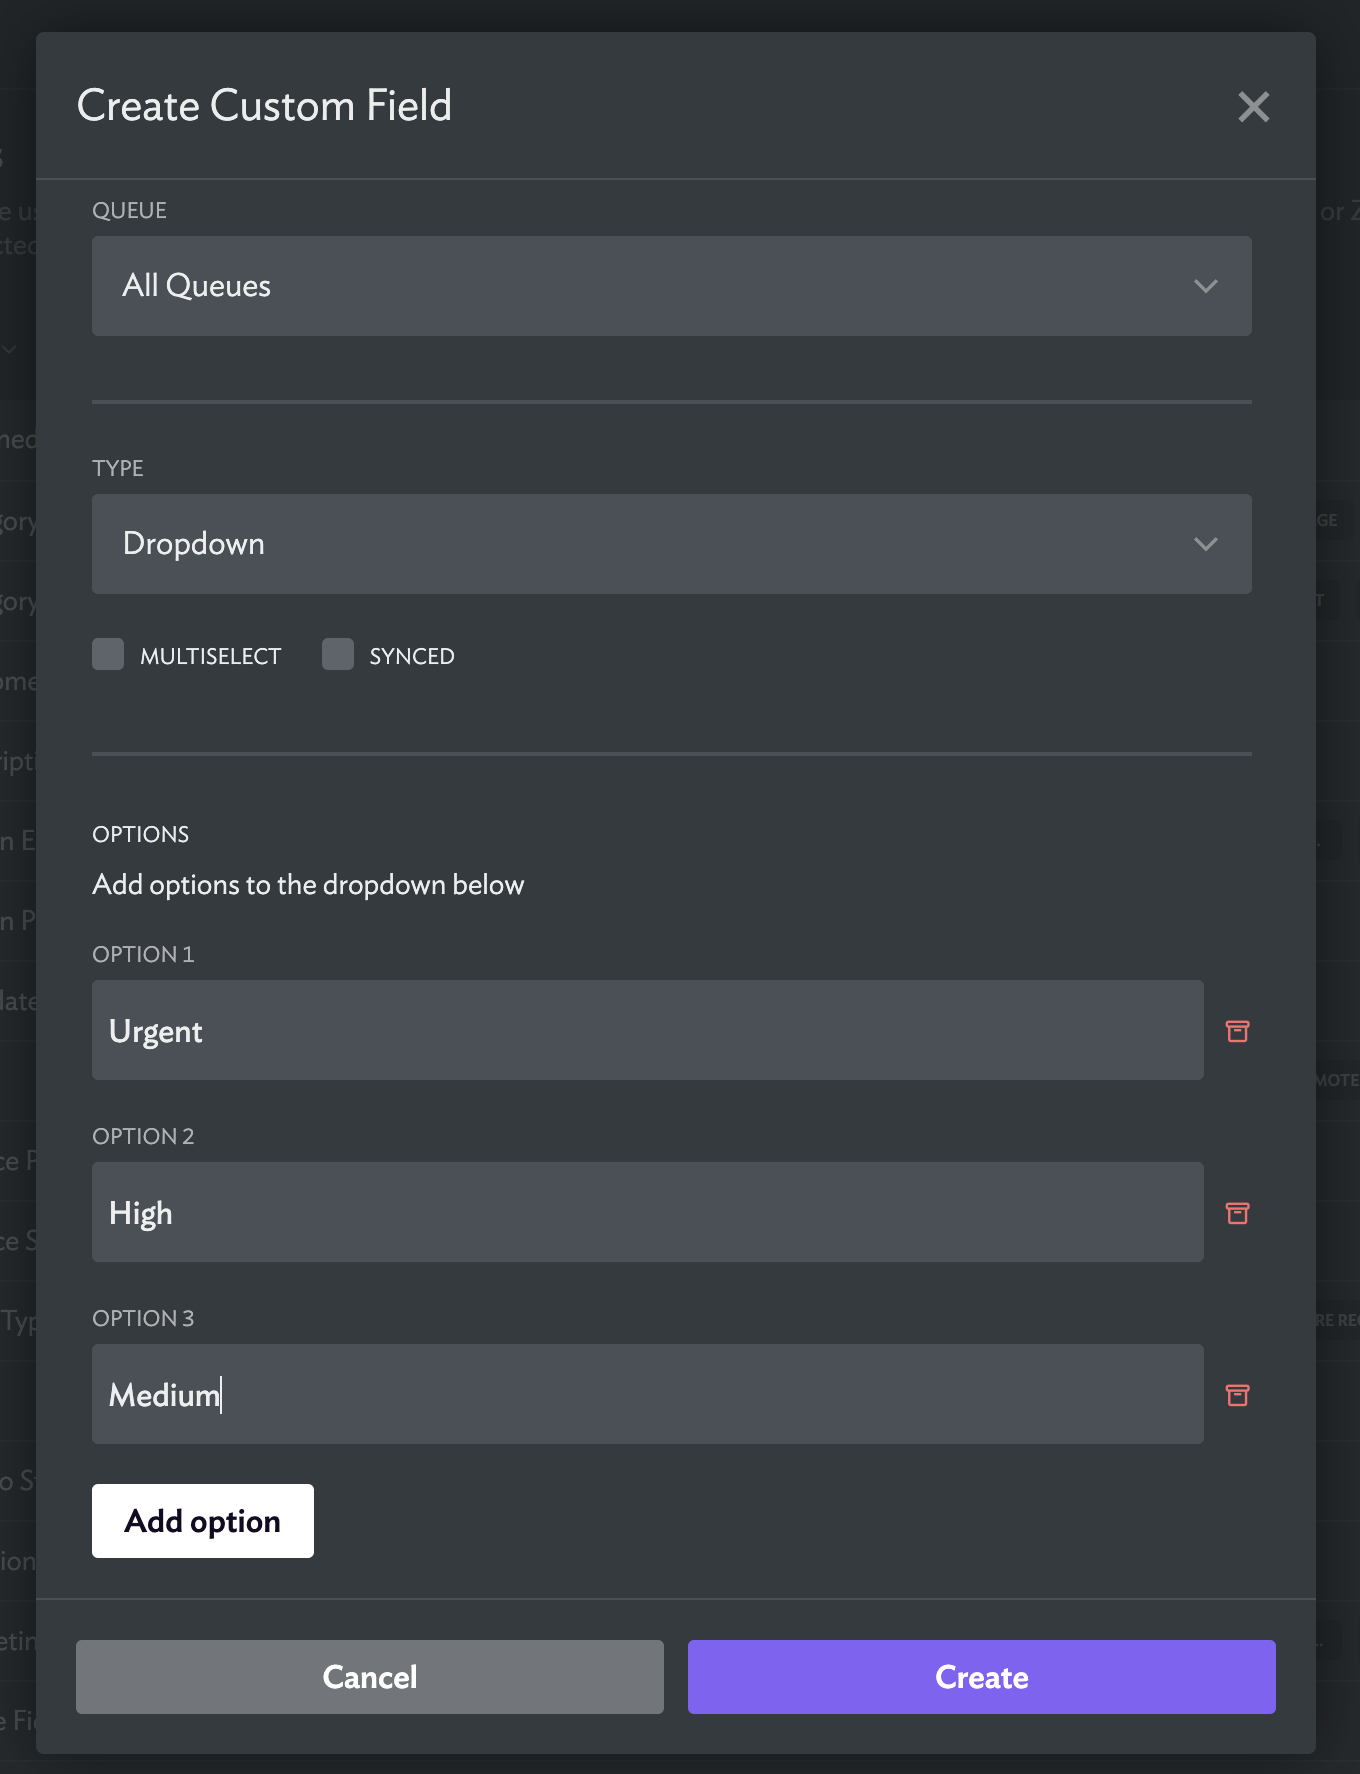
Dropdown - Dropdown custom fields are great for sorting issues. Once you select the Dropdown field type you will see more options appear below the type selector. You can add you dropdown options through the 'Add option' button.Dropdown fields can have two special types Multi-select - Select multiple options. Pretty self-explanatory :). Synced - If you're using a Jira or Zendesk integration, synced fields are a quick way to get your fields that are already set up in Jira or Zendesk into Halp without having to copy/paste all of your options. Note: This does not automatically map the field to your integration. For information on how to do that see here: Field Mapping for Zendesk or Field Mapping for Jira.
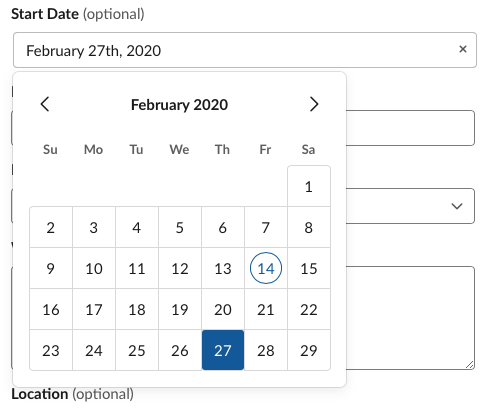
Date - This will prompt end-users with a calendar type picker to select the date.
User - This field type will generate a list of all the users in your Slack workspace. A great use for this option is if you need approval for a software access request from the requester's manager, the end-user could select them from a list.
Computed - These are a special field type that Halp currently auto-generates, so you won't see this as an option when you create a custom field. Currently the two computed fields are: "Link to Triage Channel Thread" which creates a link back to the synced Slack thread that Agents can interact with End-users through, and "Ticket Creation Method" which is how the ticket was originally created (whether through an emoji, slash command, etc). This field type can be helpful for users with Jira or Zendesk integrations to sync that information to another platform. You'll want to make sure to map the fields on your integrations page. Find more information on that for Jira and Zendesk.
Pro Tip: Fields are organized alphabetically. If you have a lot of fields that you would like to group by form type, you can start the field's name with the form's name. For example 'New Hire - Start Date' and 'New Hire - Email' will be grouped together.
Looking for a live demo to show you how all this works? Register for our weekly webinar where we answer questions and show you Halp!
 Updated
by
Fletcher Richman
Updated
by
Fletcher Richman