Using the Tickets Tab in Teams
The Tickets tab in Teams is a way to visualize and access your current tickets in Halp, right inside of Teams. What you can see in the tab depends on your role & permissions within your organization's Halp account.
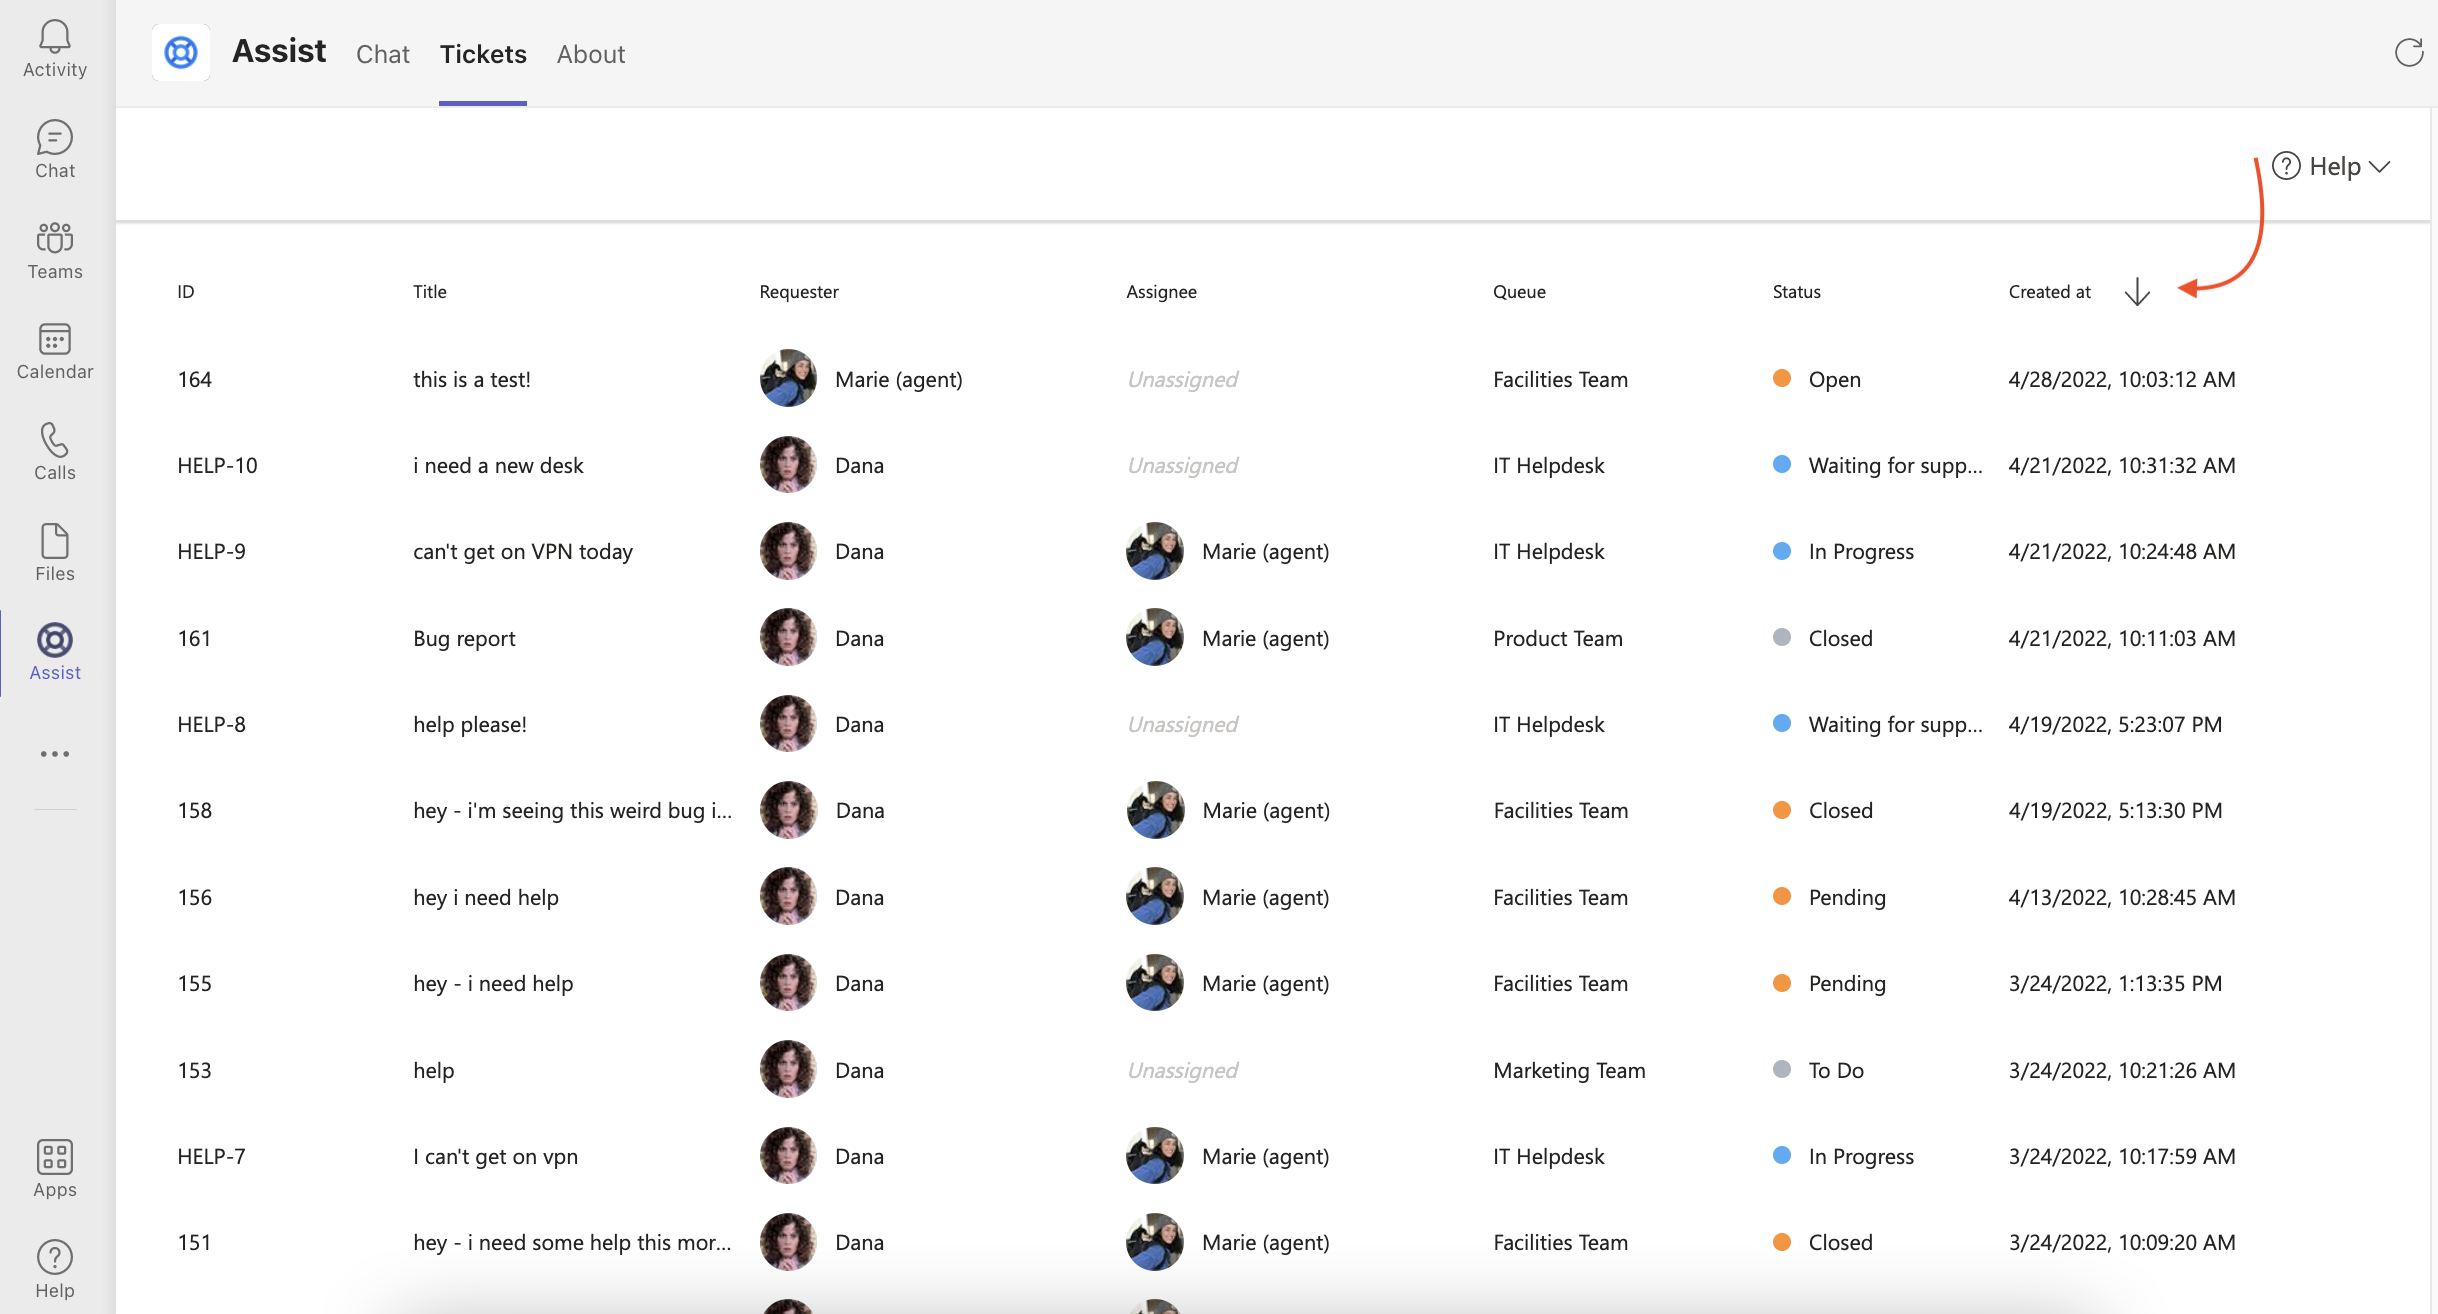
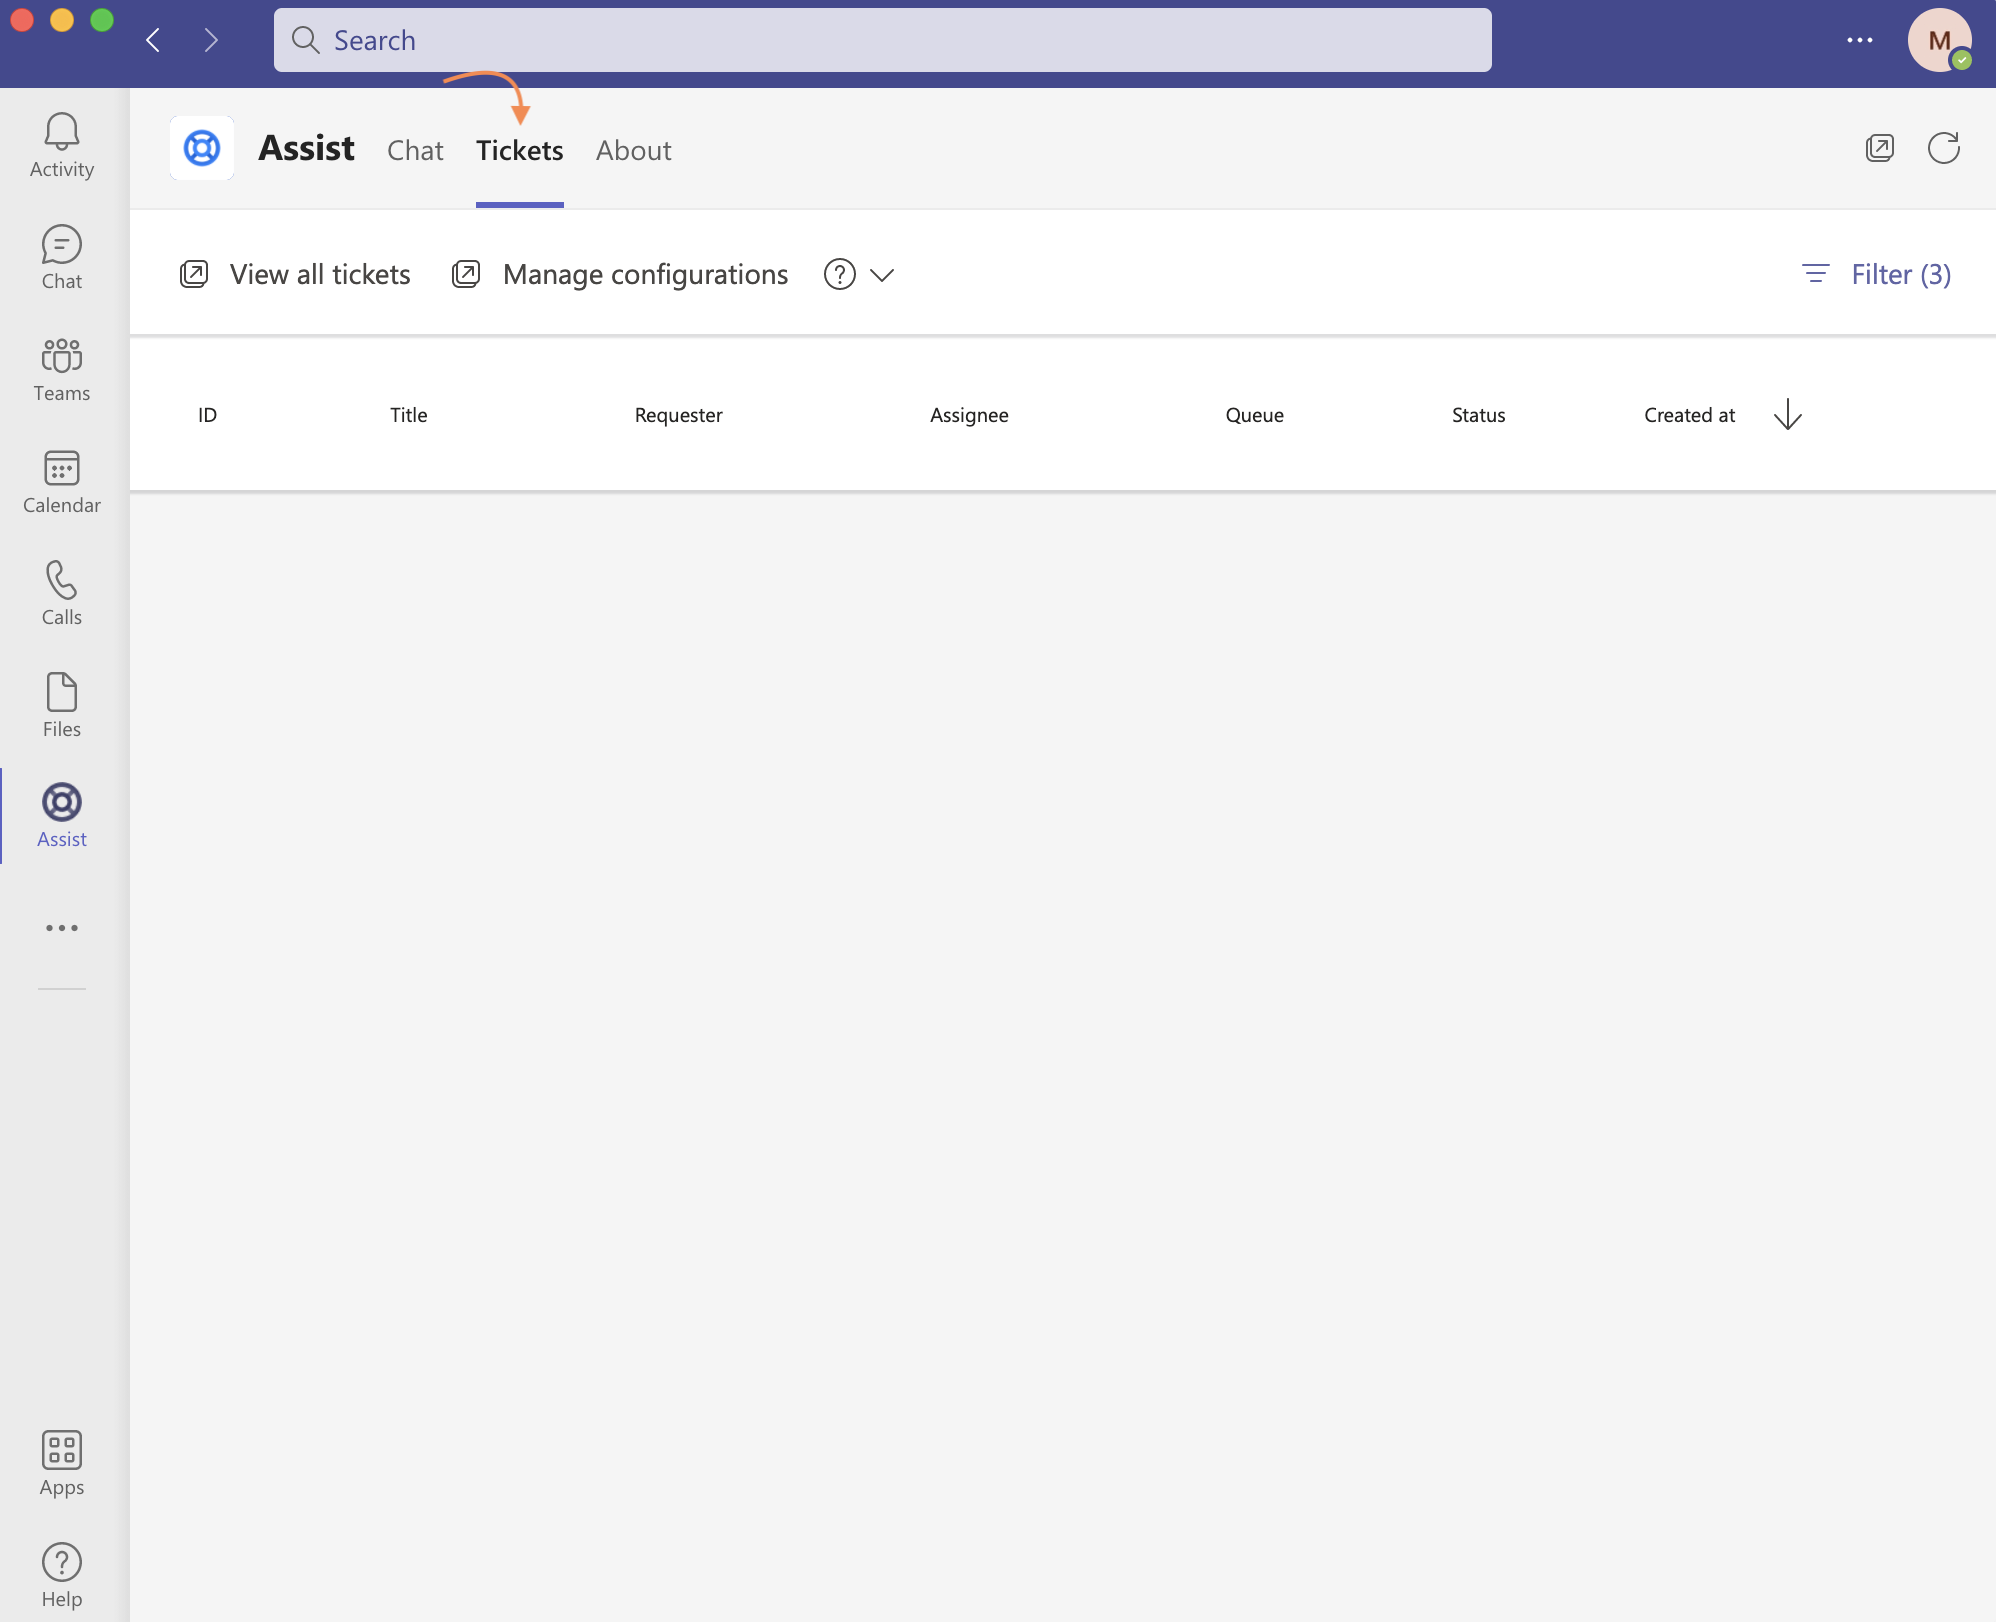
To view the Tickets Tab, either click on the Assist app in your left-most navigation bar or go to the chat/DM with Assist. Once there, click on Tickets in the top-most nav bar (within the Assist app).
For Agents and Admins
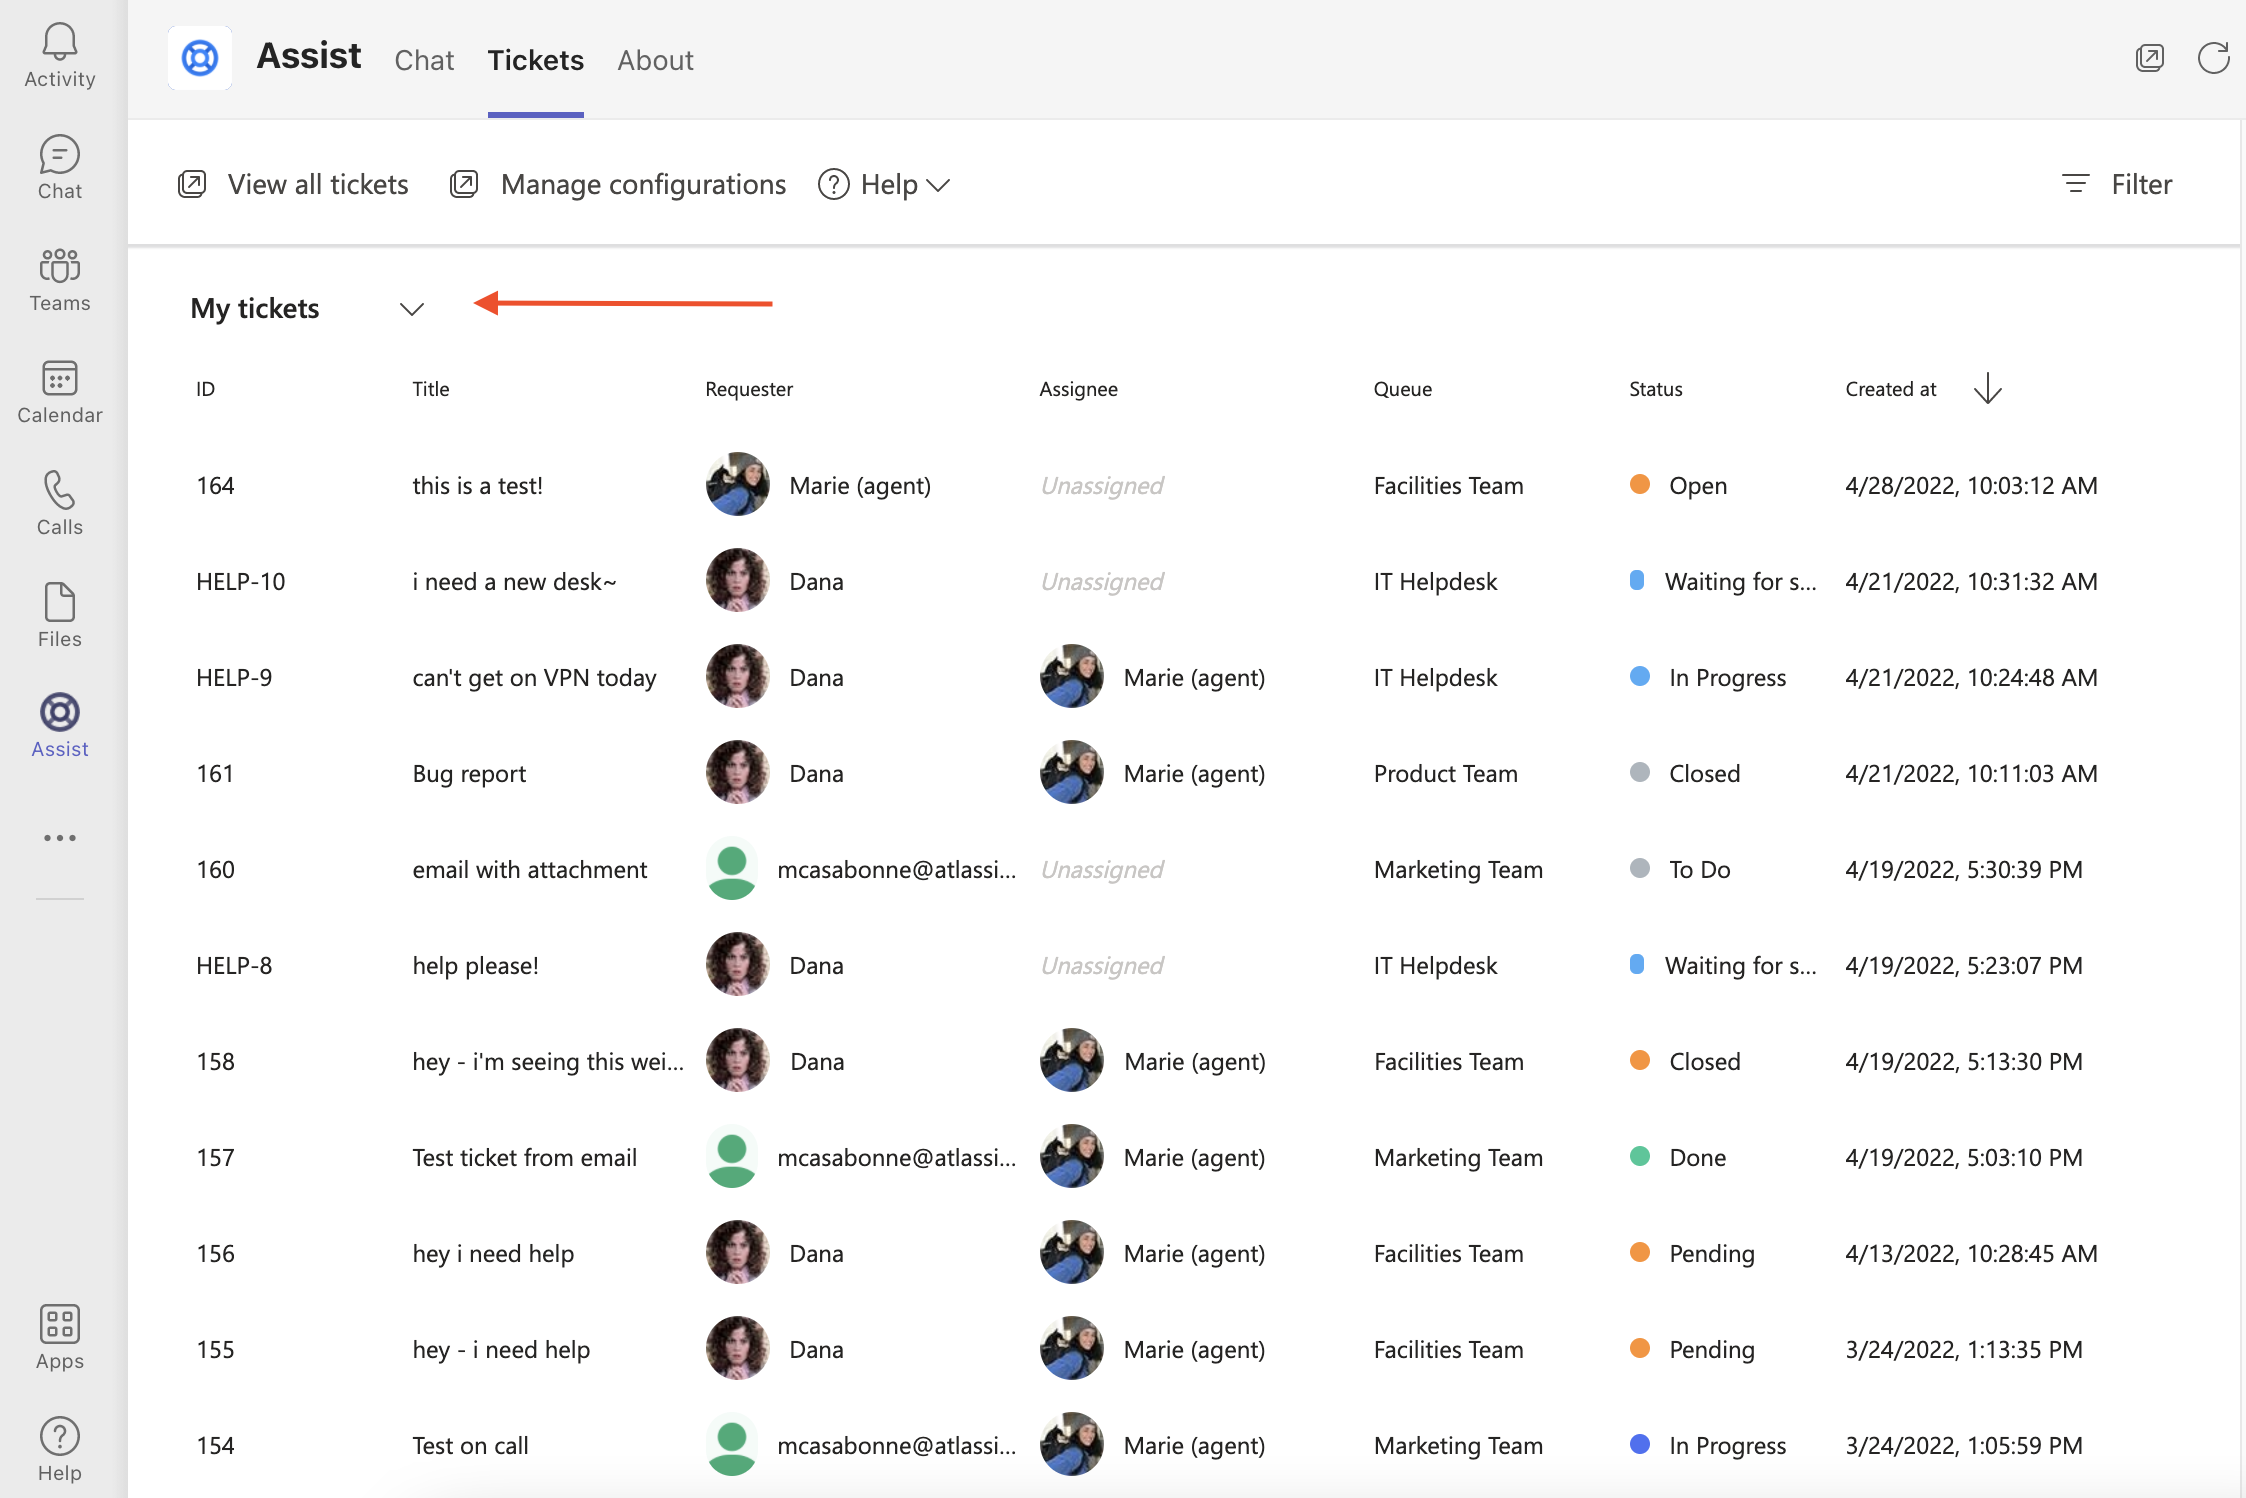
If a user is an Agent or Admin in Halp, when viewing the Tickets tab they will be able to toggle between two views:
- My Tickets are tickets from the Queues they are an Agent or Admin in
- My Requests are tickets they have submitted/are the Requester on and tickets they have been added as a Follower to
My Tickets
When viewing My Tickets, Agents and Admins will see the first 100 tickets for all of the Queues they are a member of.
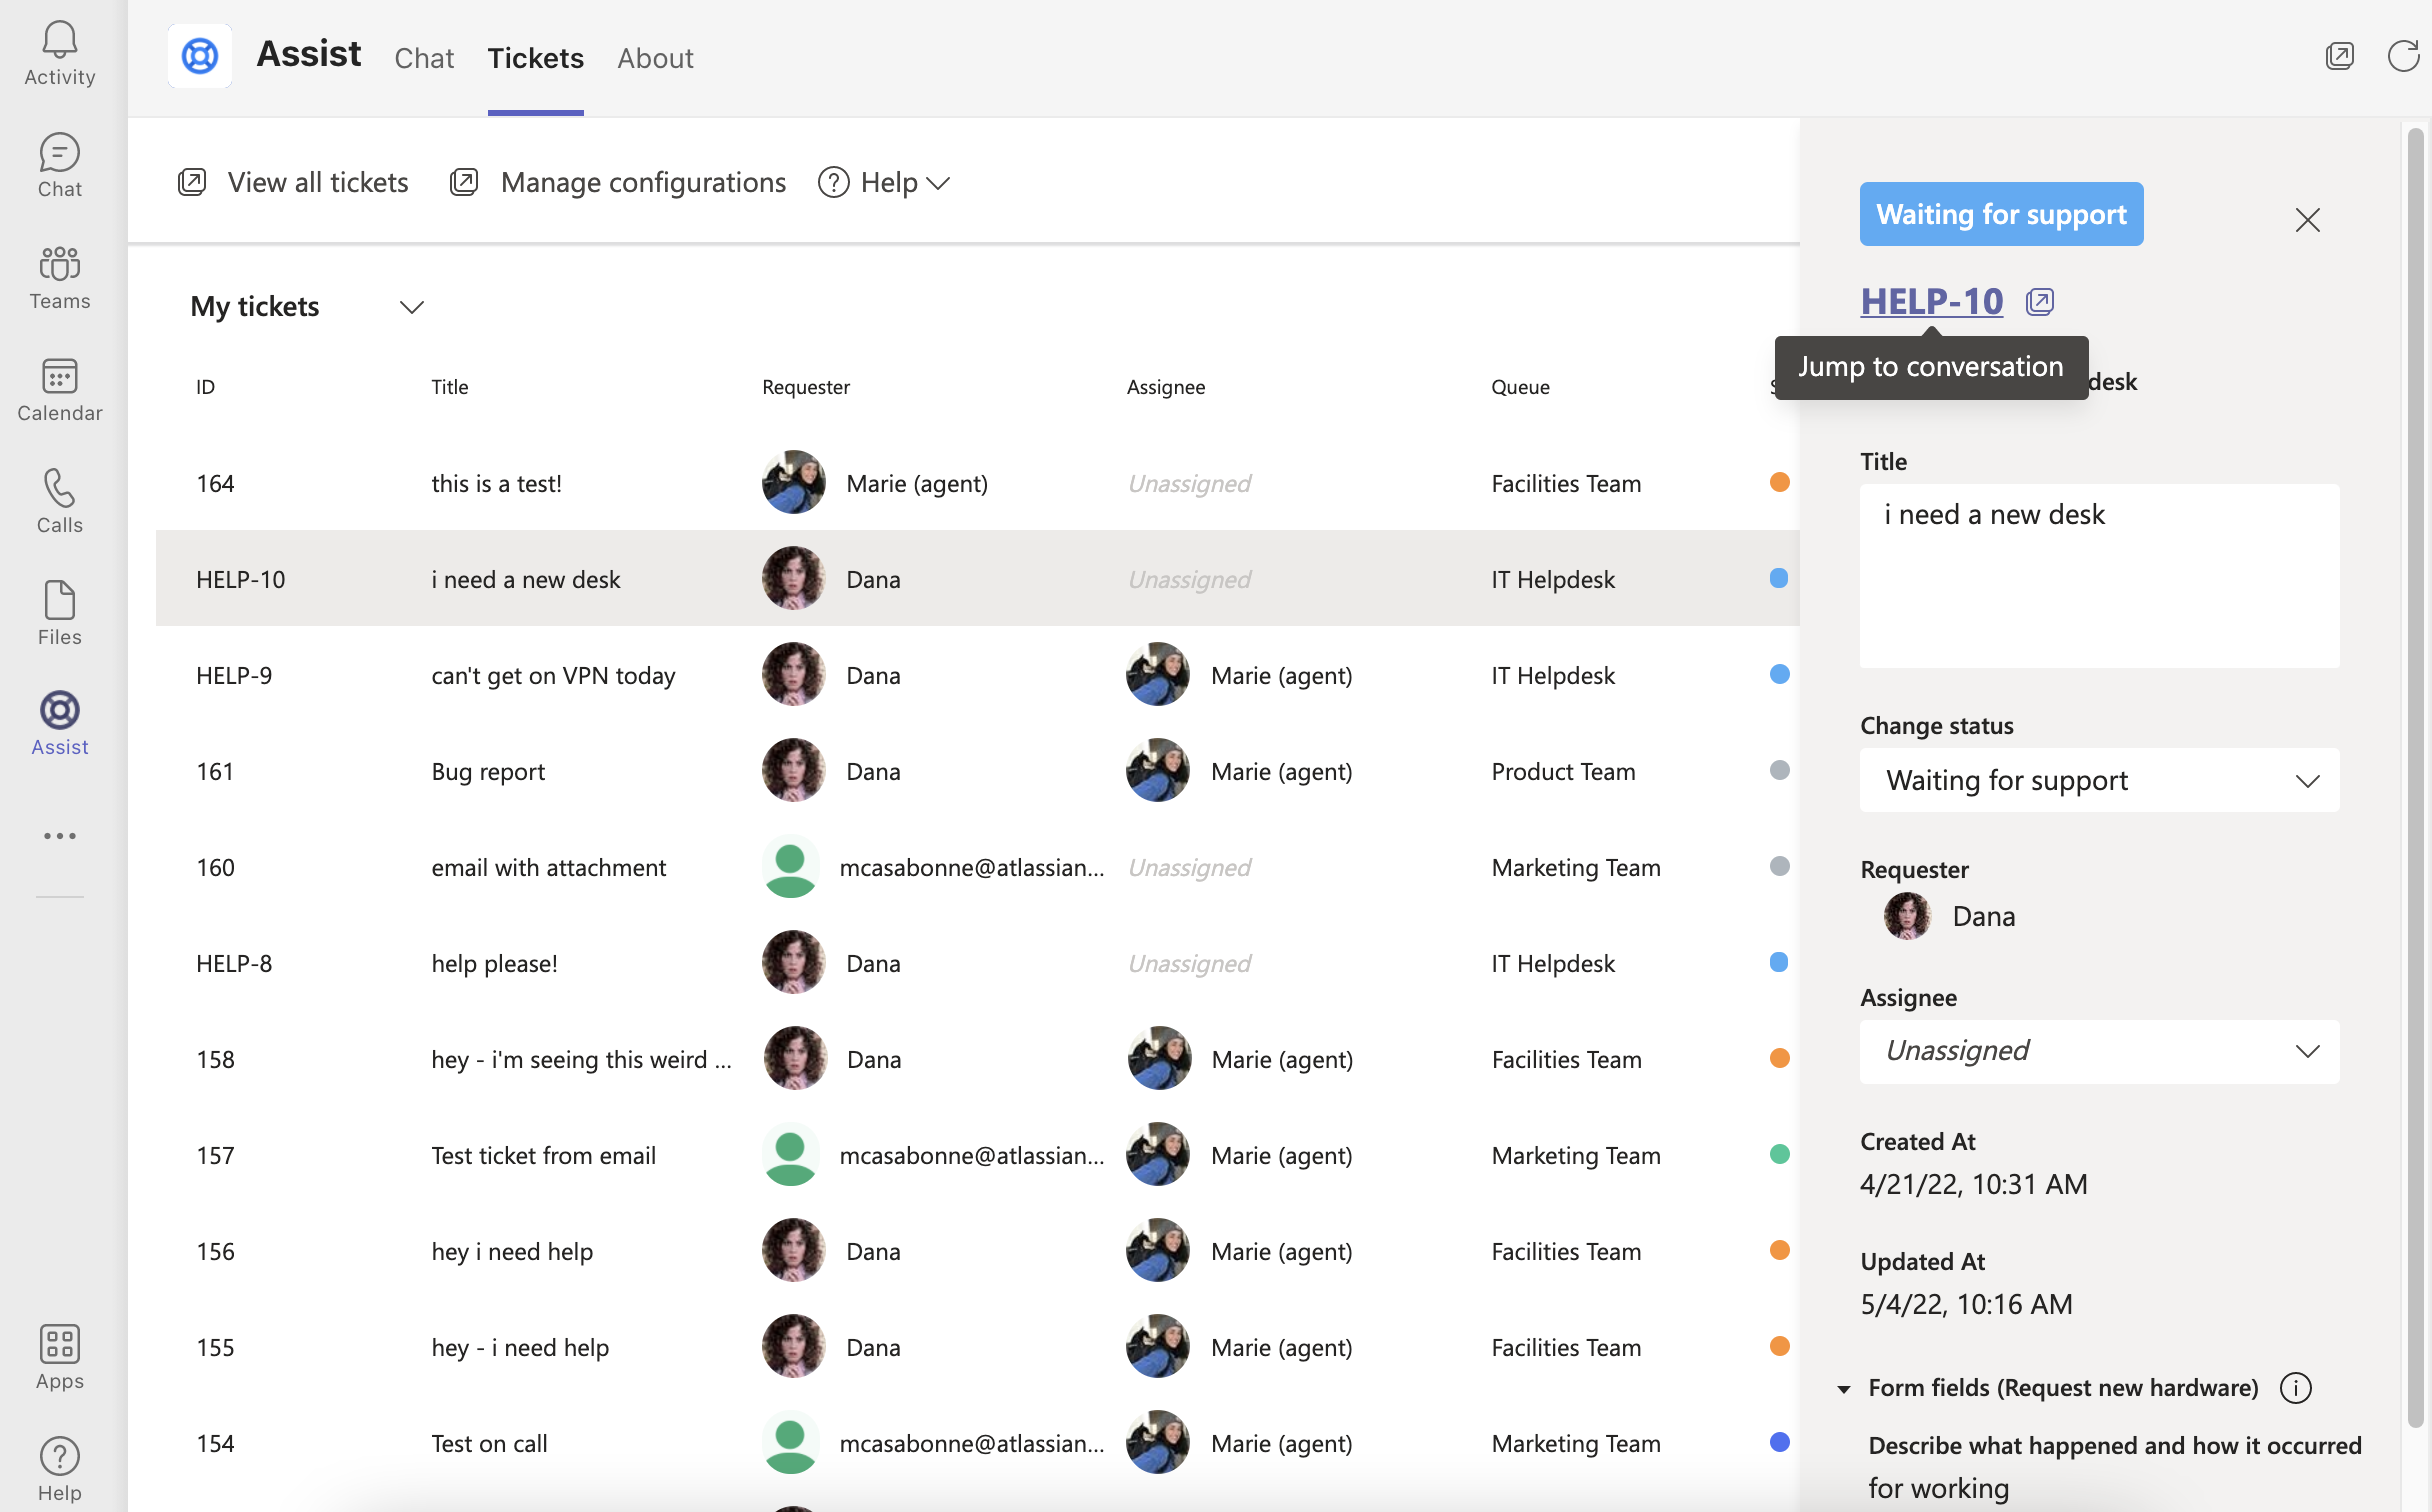
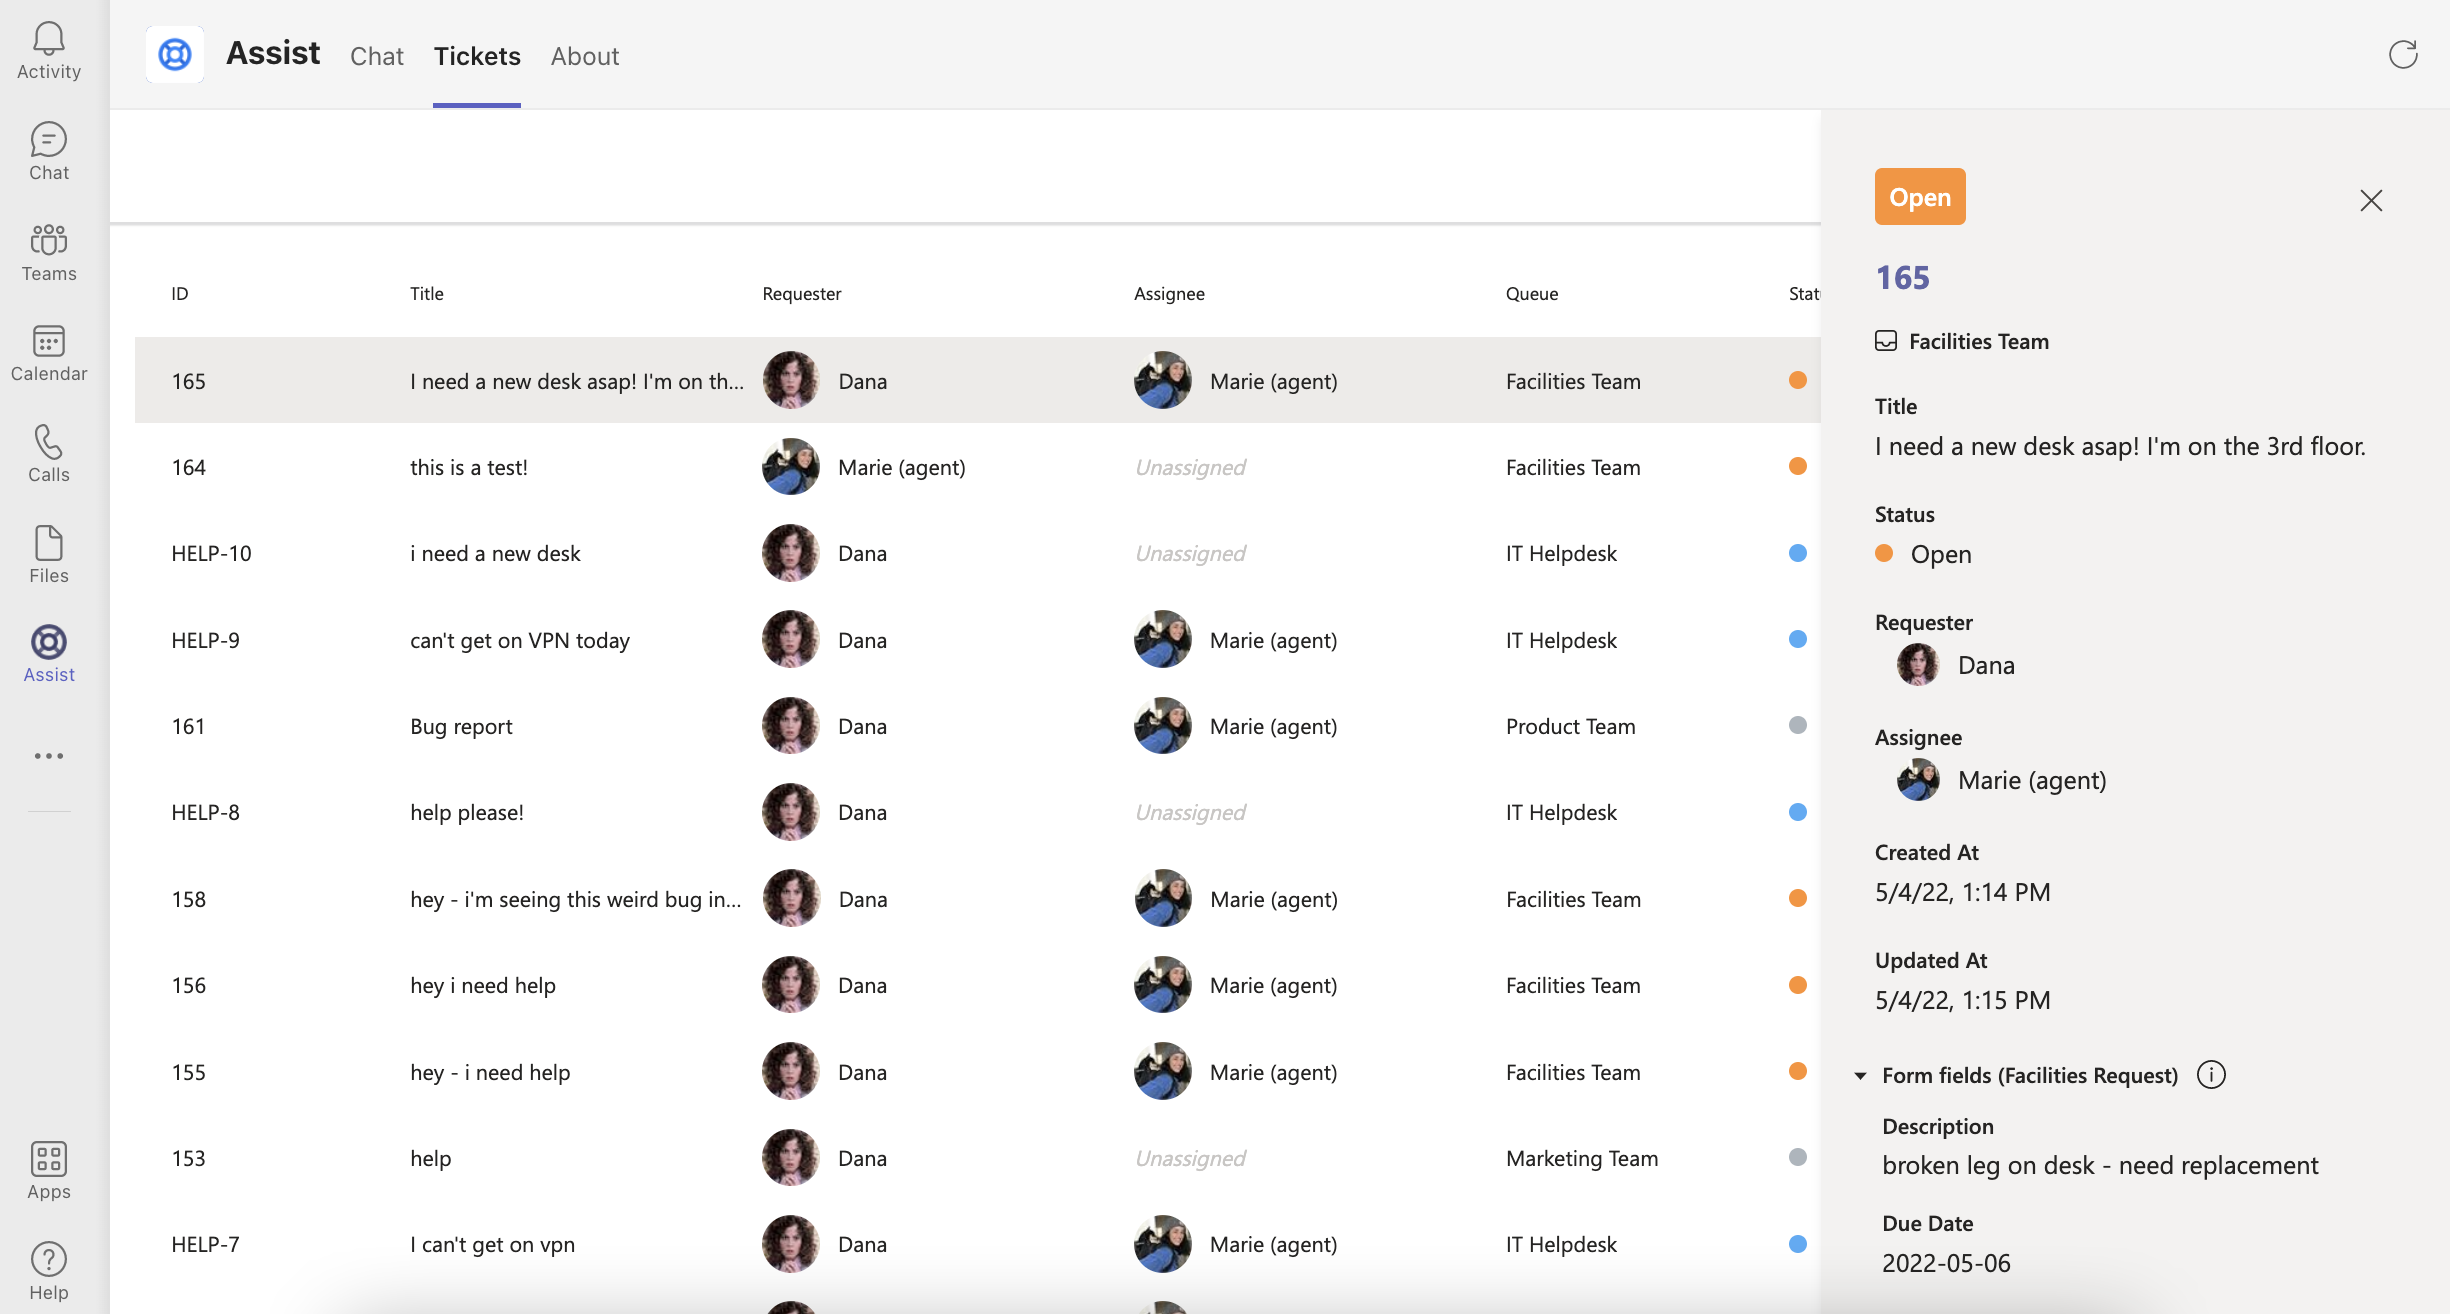
Ticket Details
To view the ticket details, Agents and Admins can click on any row will open a sidebar. Here, they can edit certain ticket fields and take quick actions.
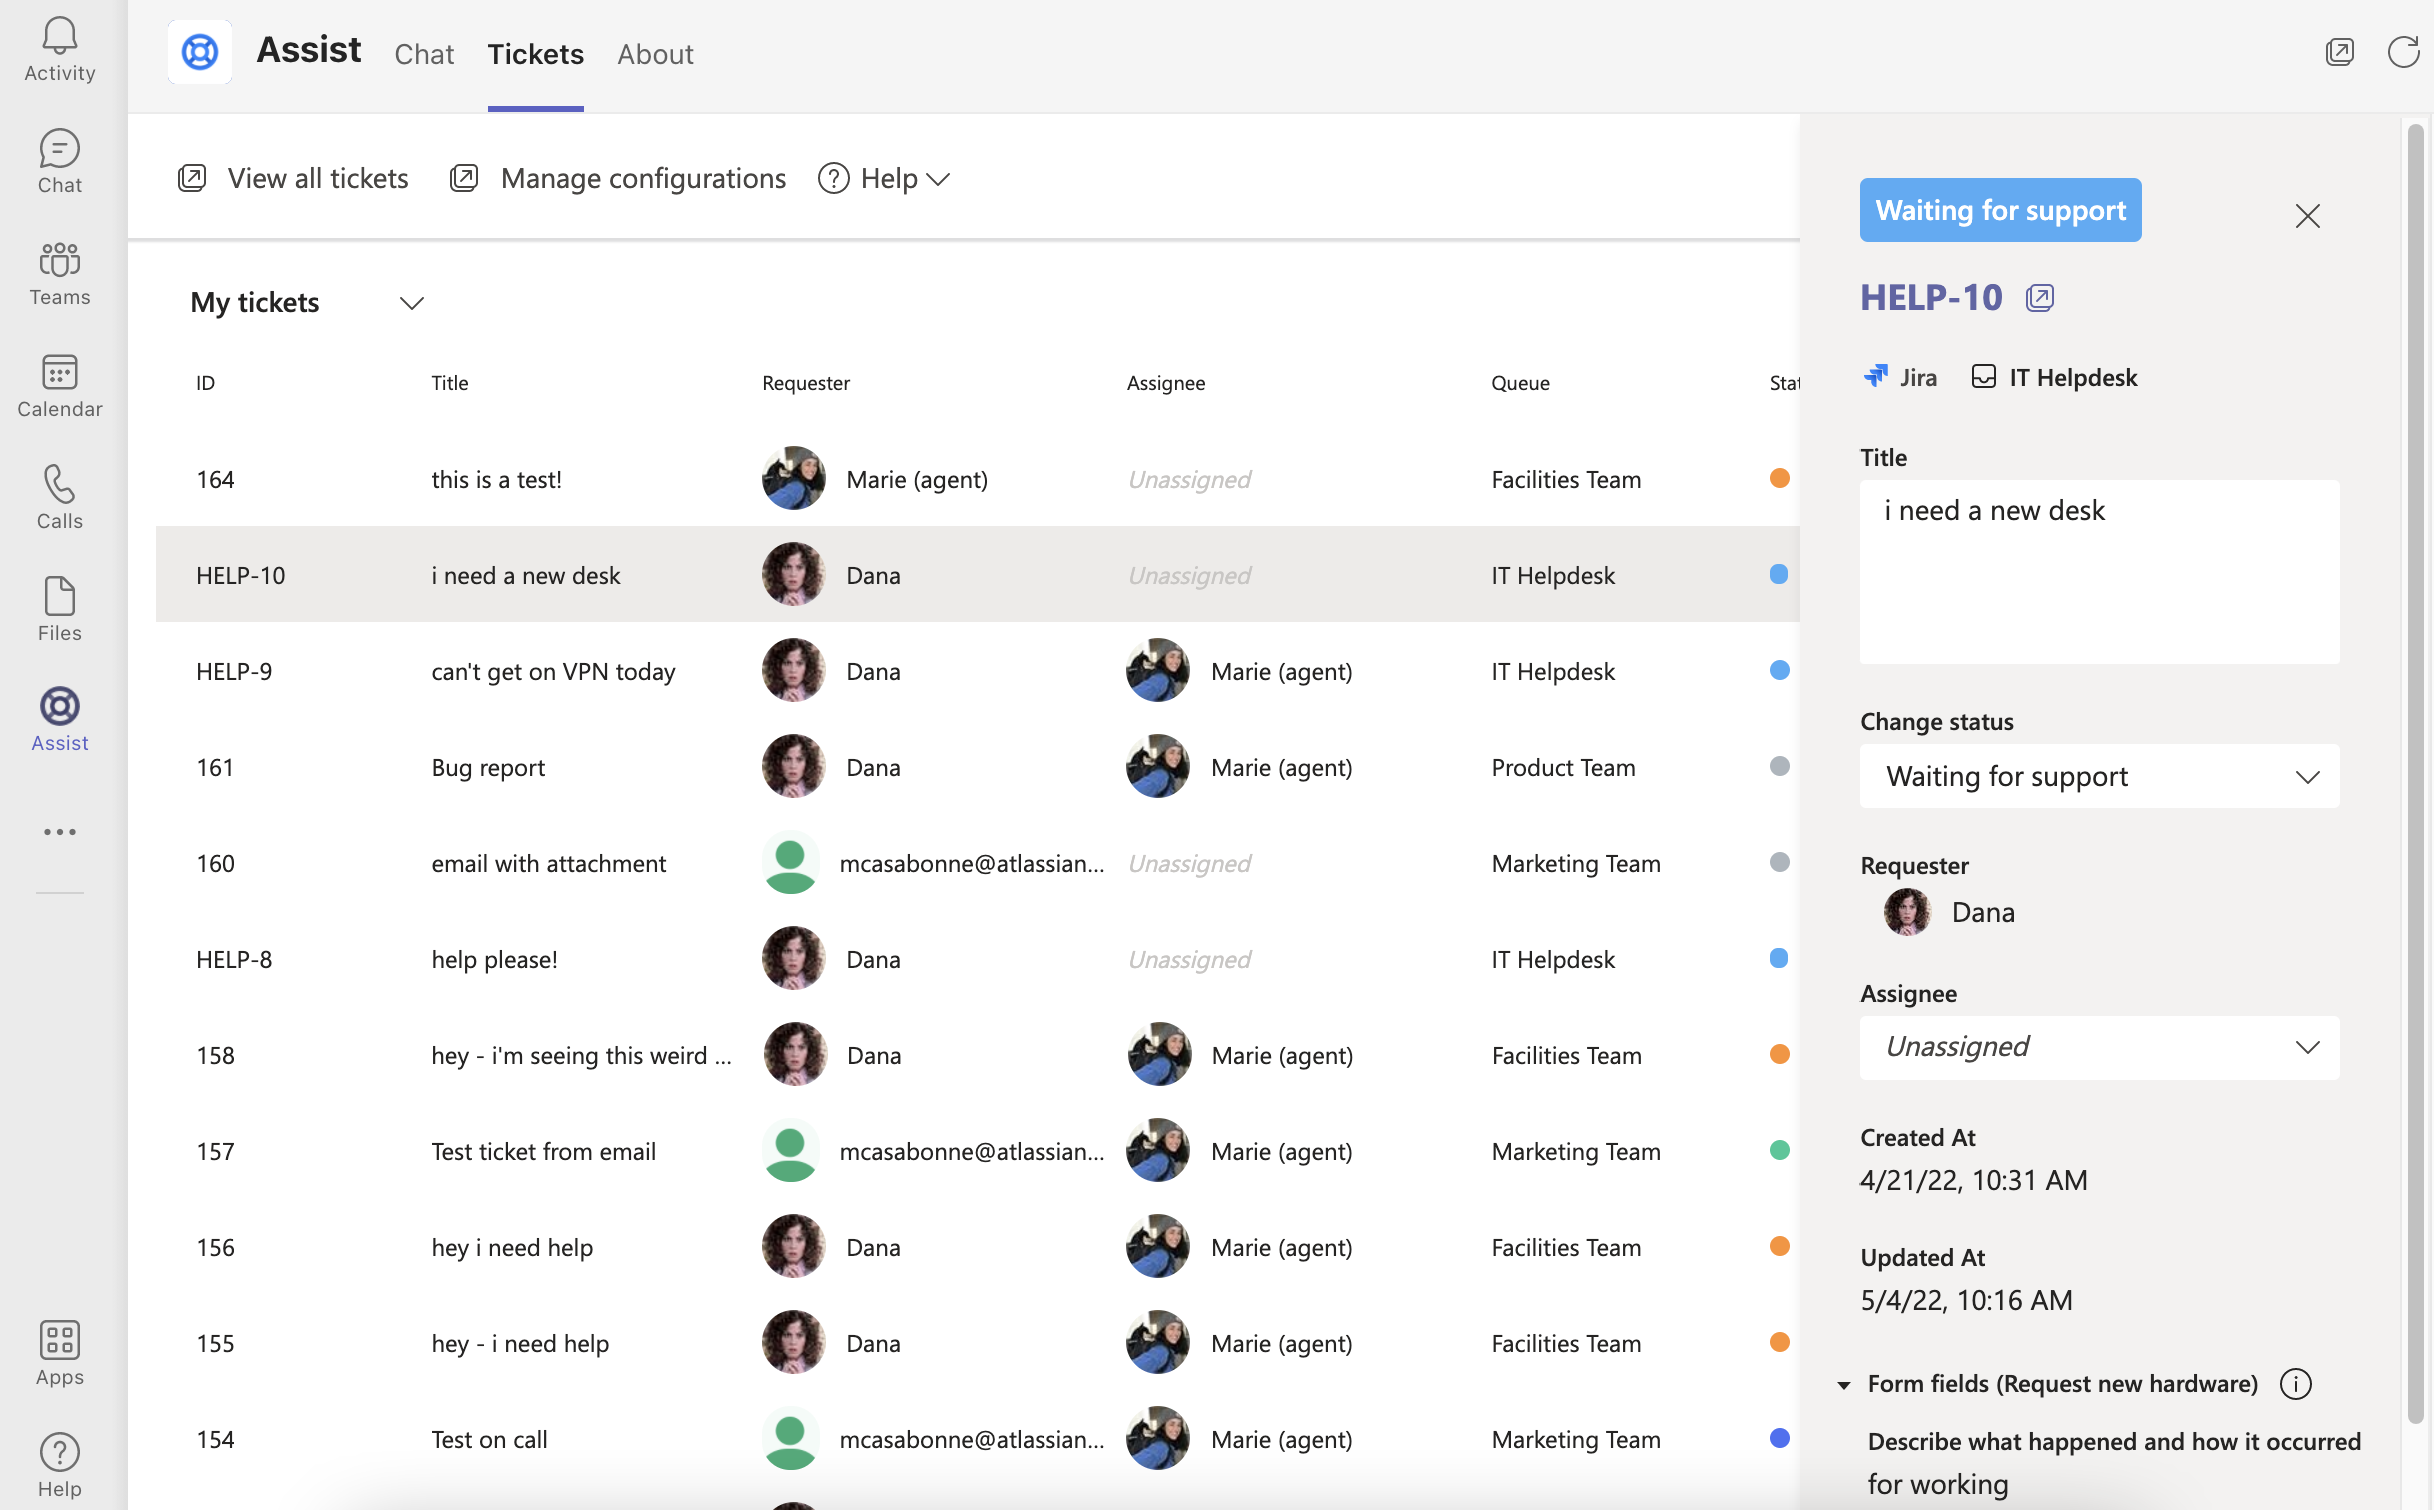
The details surfaced in the sidebar include:
- Ticket number/ID
- Queue
- Title/Summary [editable]
- Status [editable]
- Requester
- Assignee [editable]
- Creation timestamp
- Last updated timestamp
- Form fields (fields from the user submitted form)
- Queue fields (any additional fields available on this queue)
- Global fields (any additional fields available to all queues)
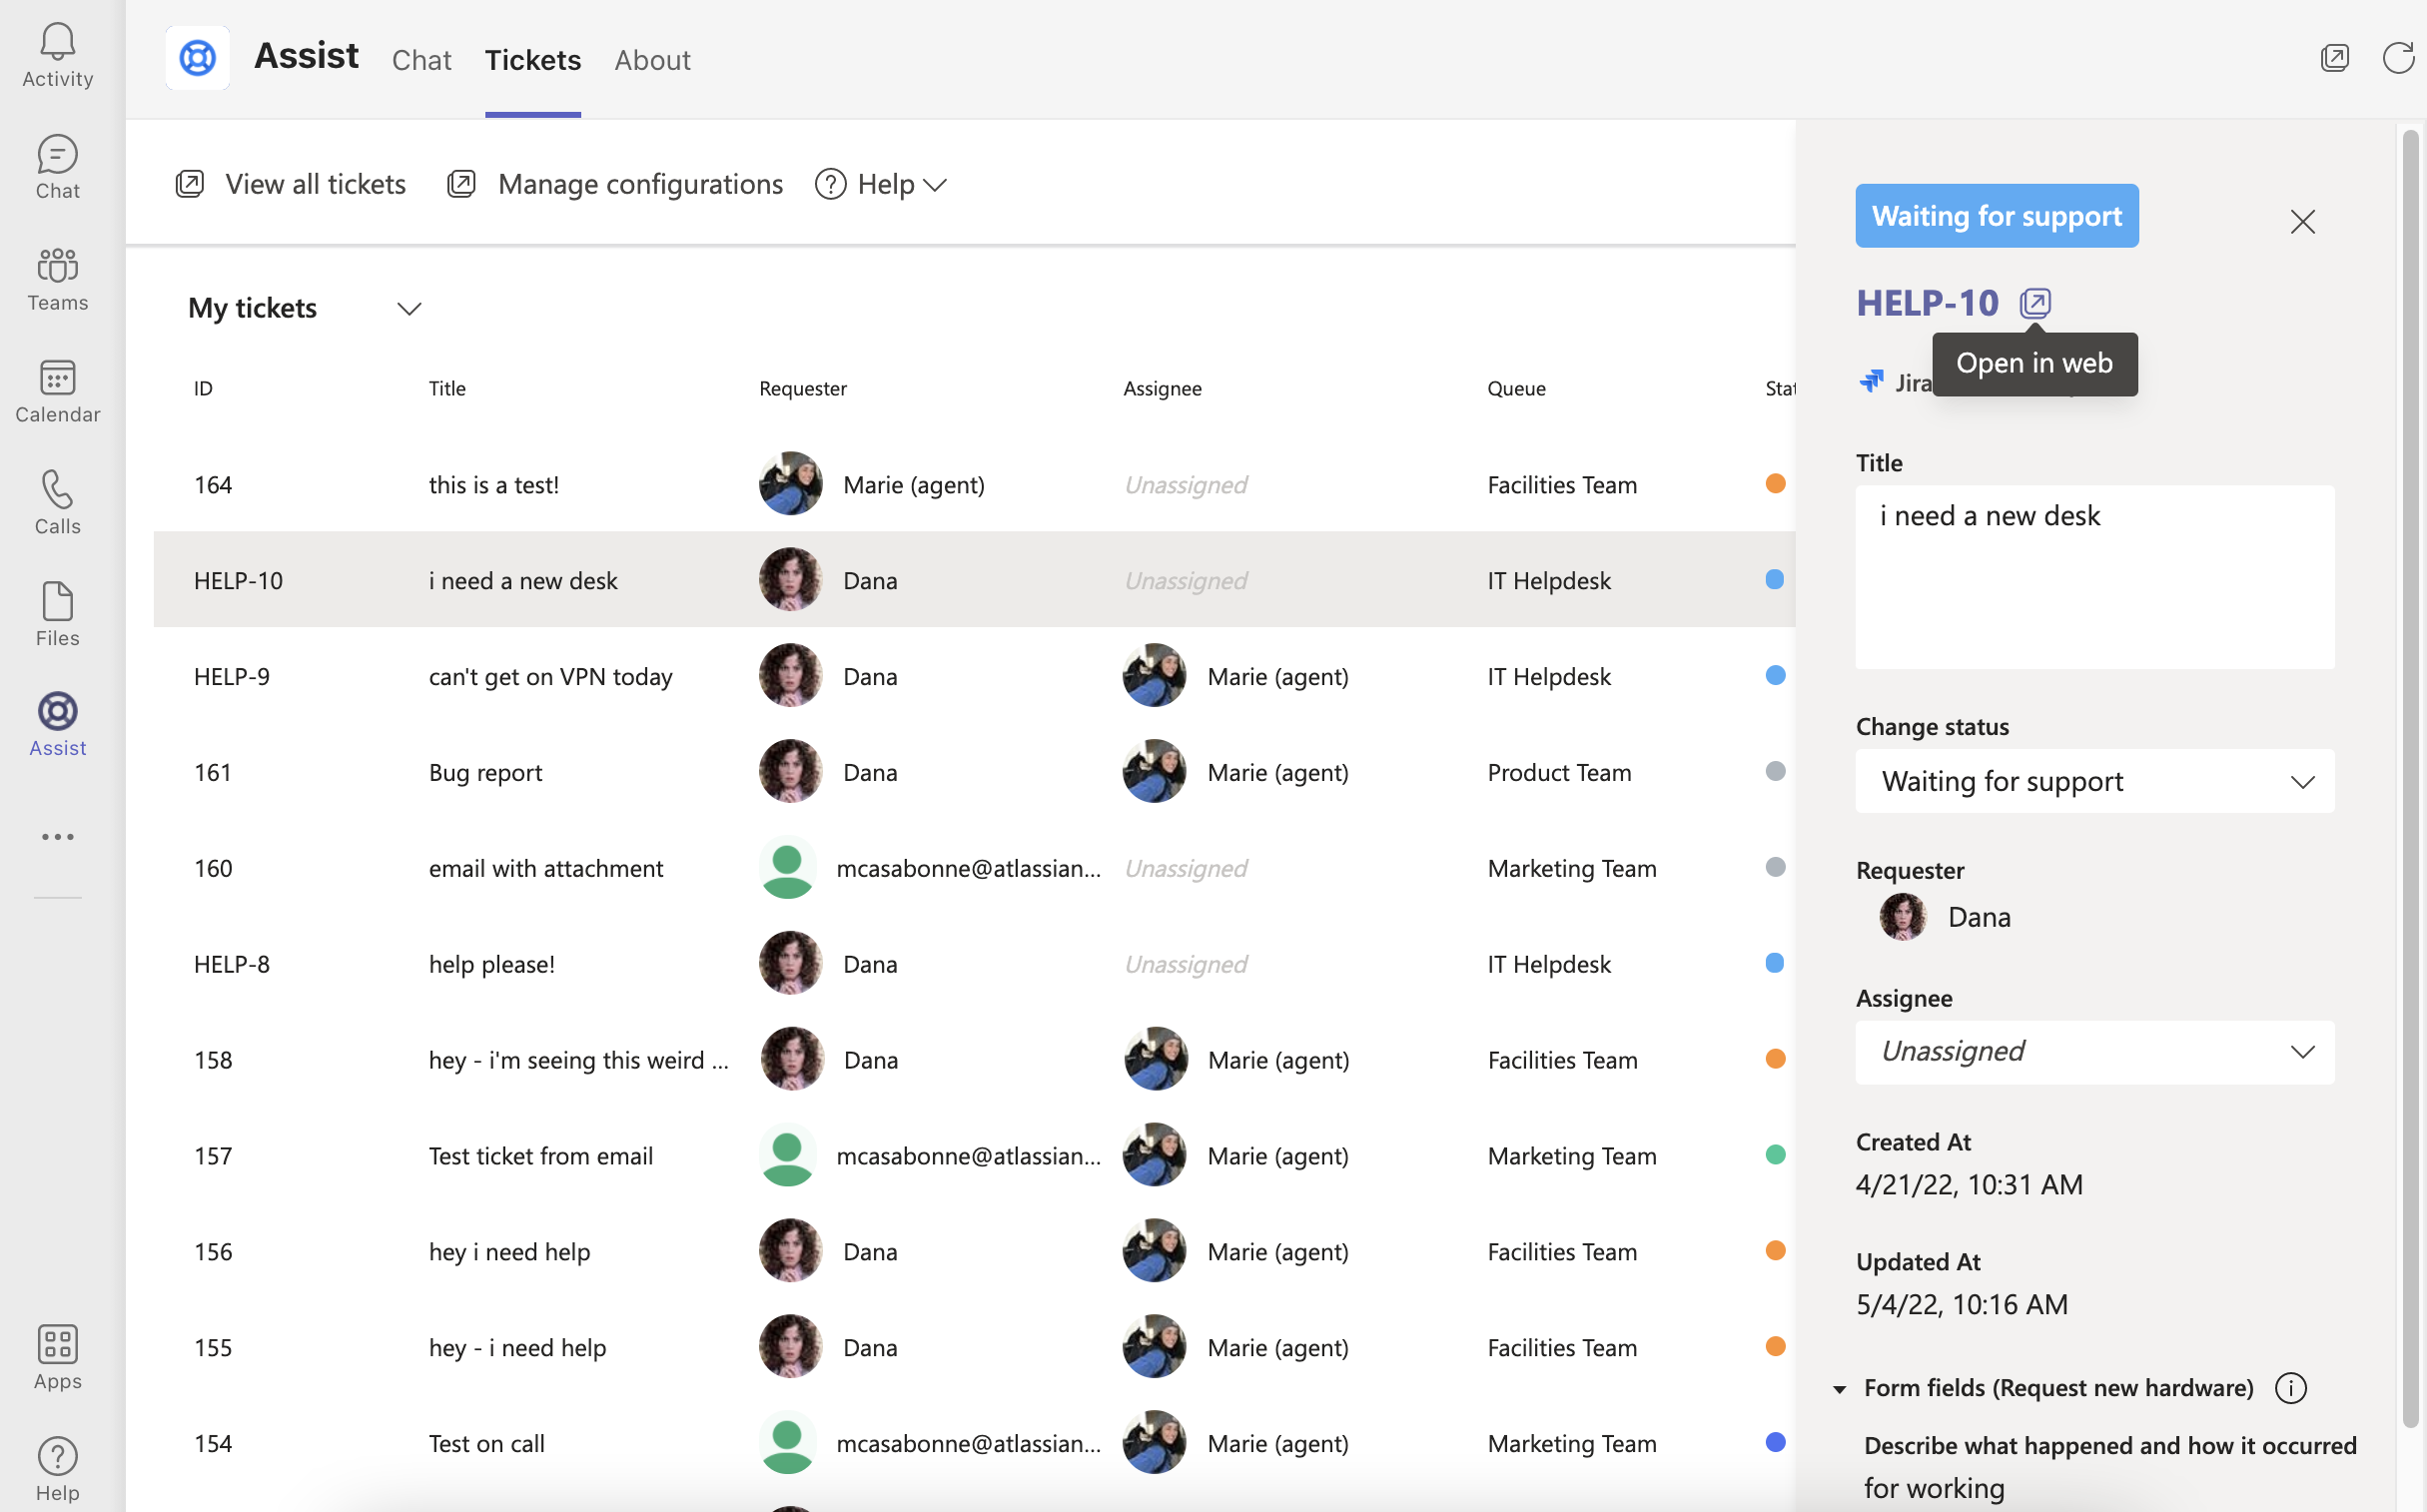
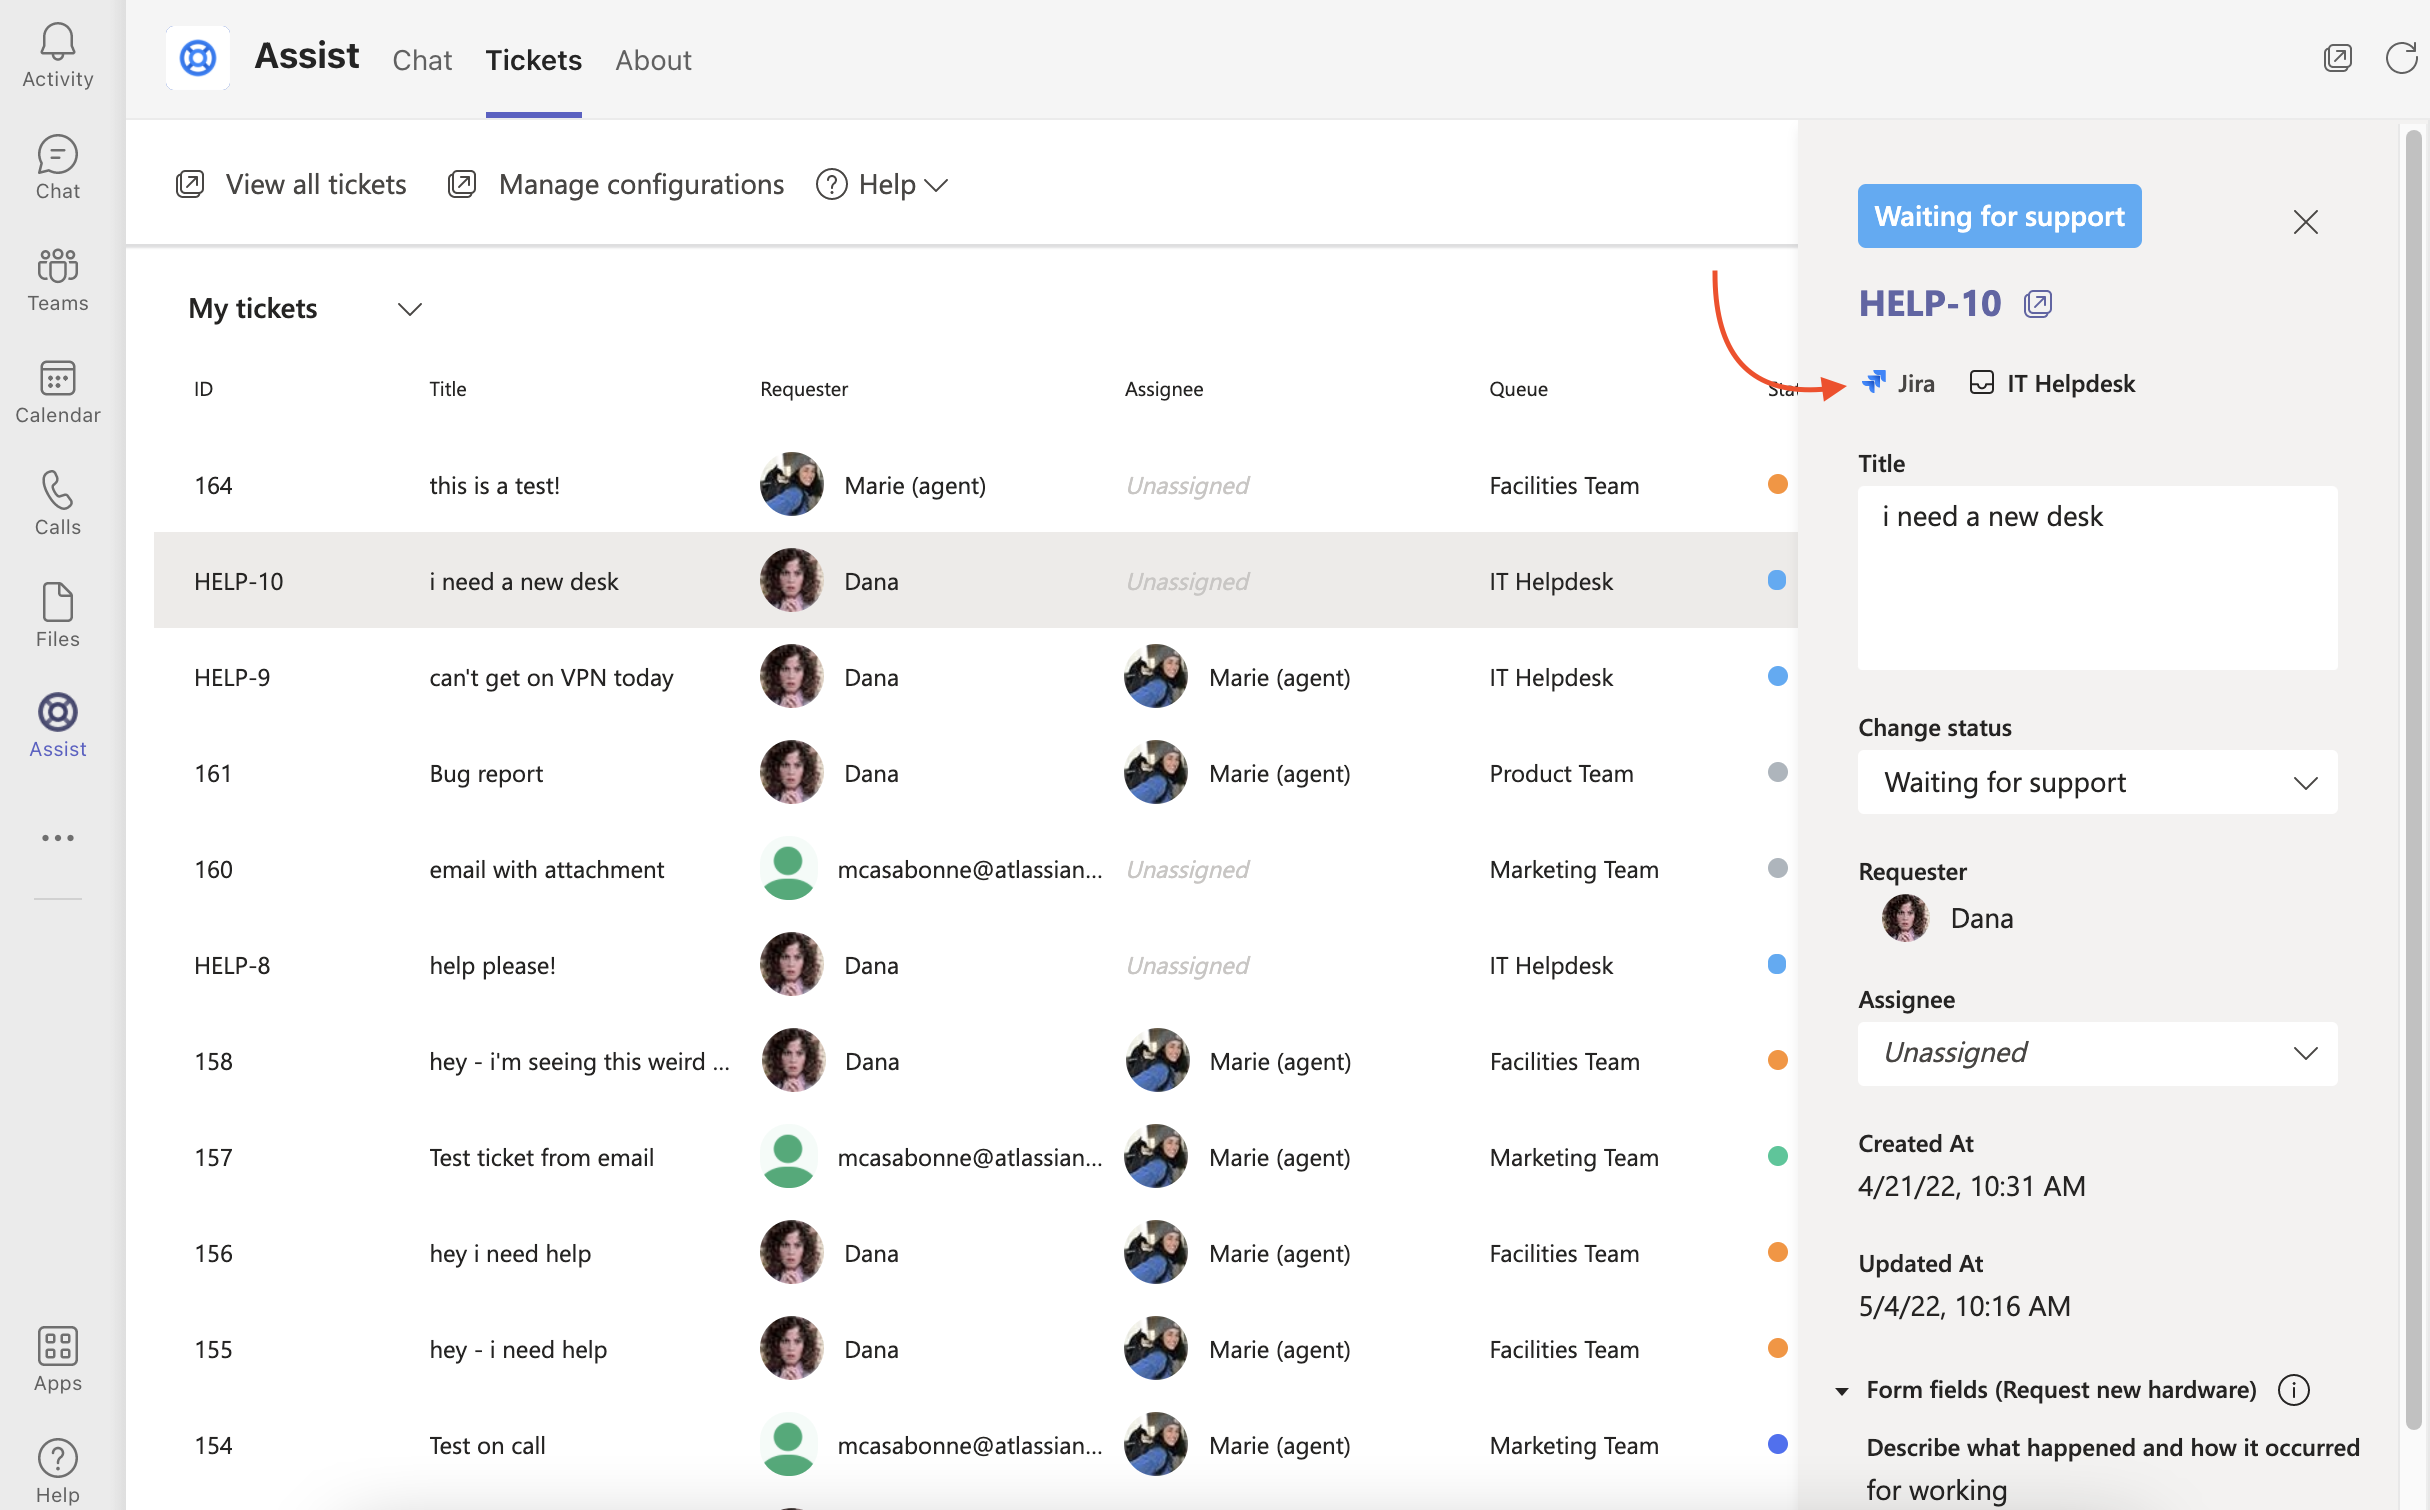
Quick Actions
- Jump to Conversation: Click the Ticket ID to deep link over to the ticket's adaptive card within your Triage Channel. From there, you can reply, add notes, assign, and close out the ticket
- Open in Web: Click on the pop out icon to open the ticket in Halp Web
- Open in Jira or Zendesk: Click on the Jira or Zendesk logo to open the ticket in either system. This will only appear on tickets where you've already configured the integration
Filtering & Sorting
Click on the Filter button in the top right to reveal the Filters Sidebar. From here, the following filters can be applied:
- Queue(s)
- Status(es)
- Assignee(s)
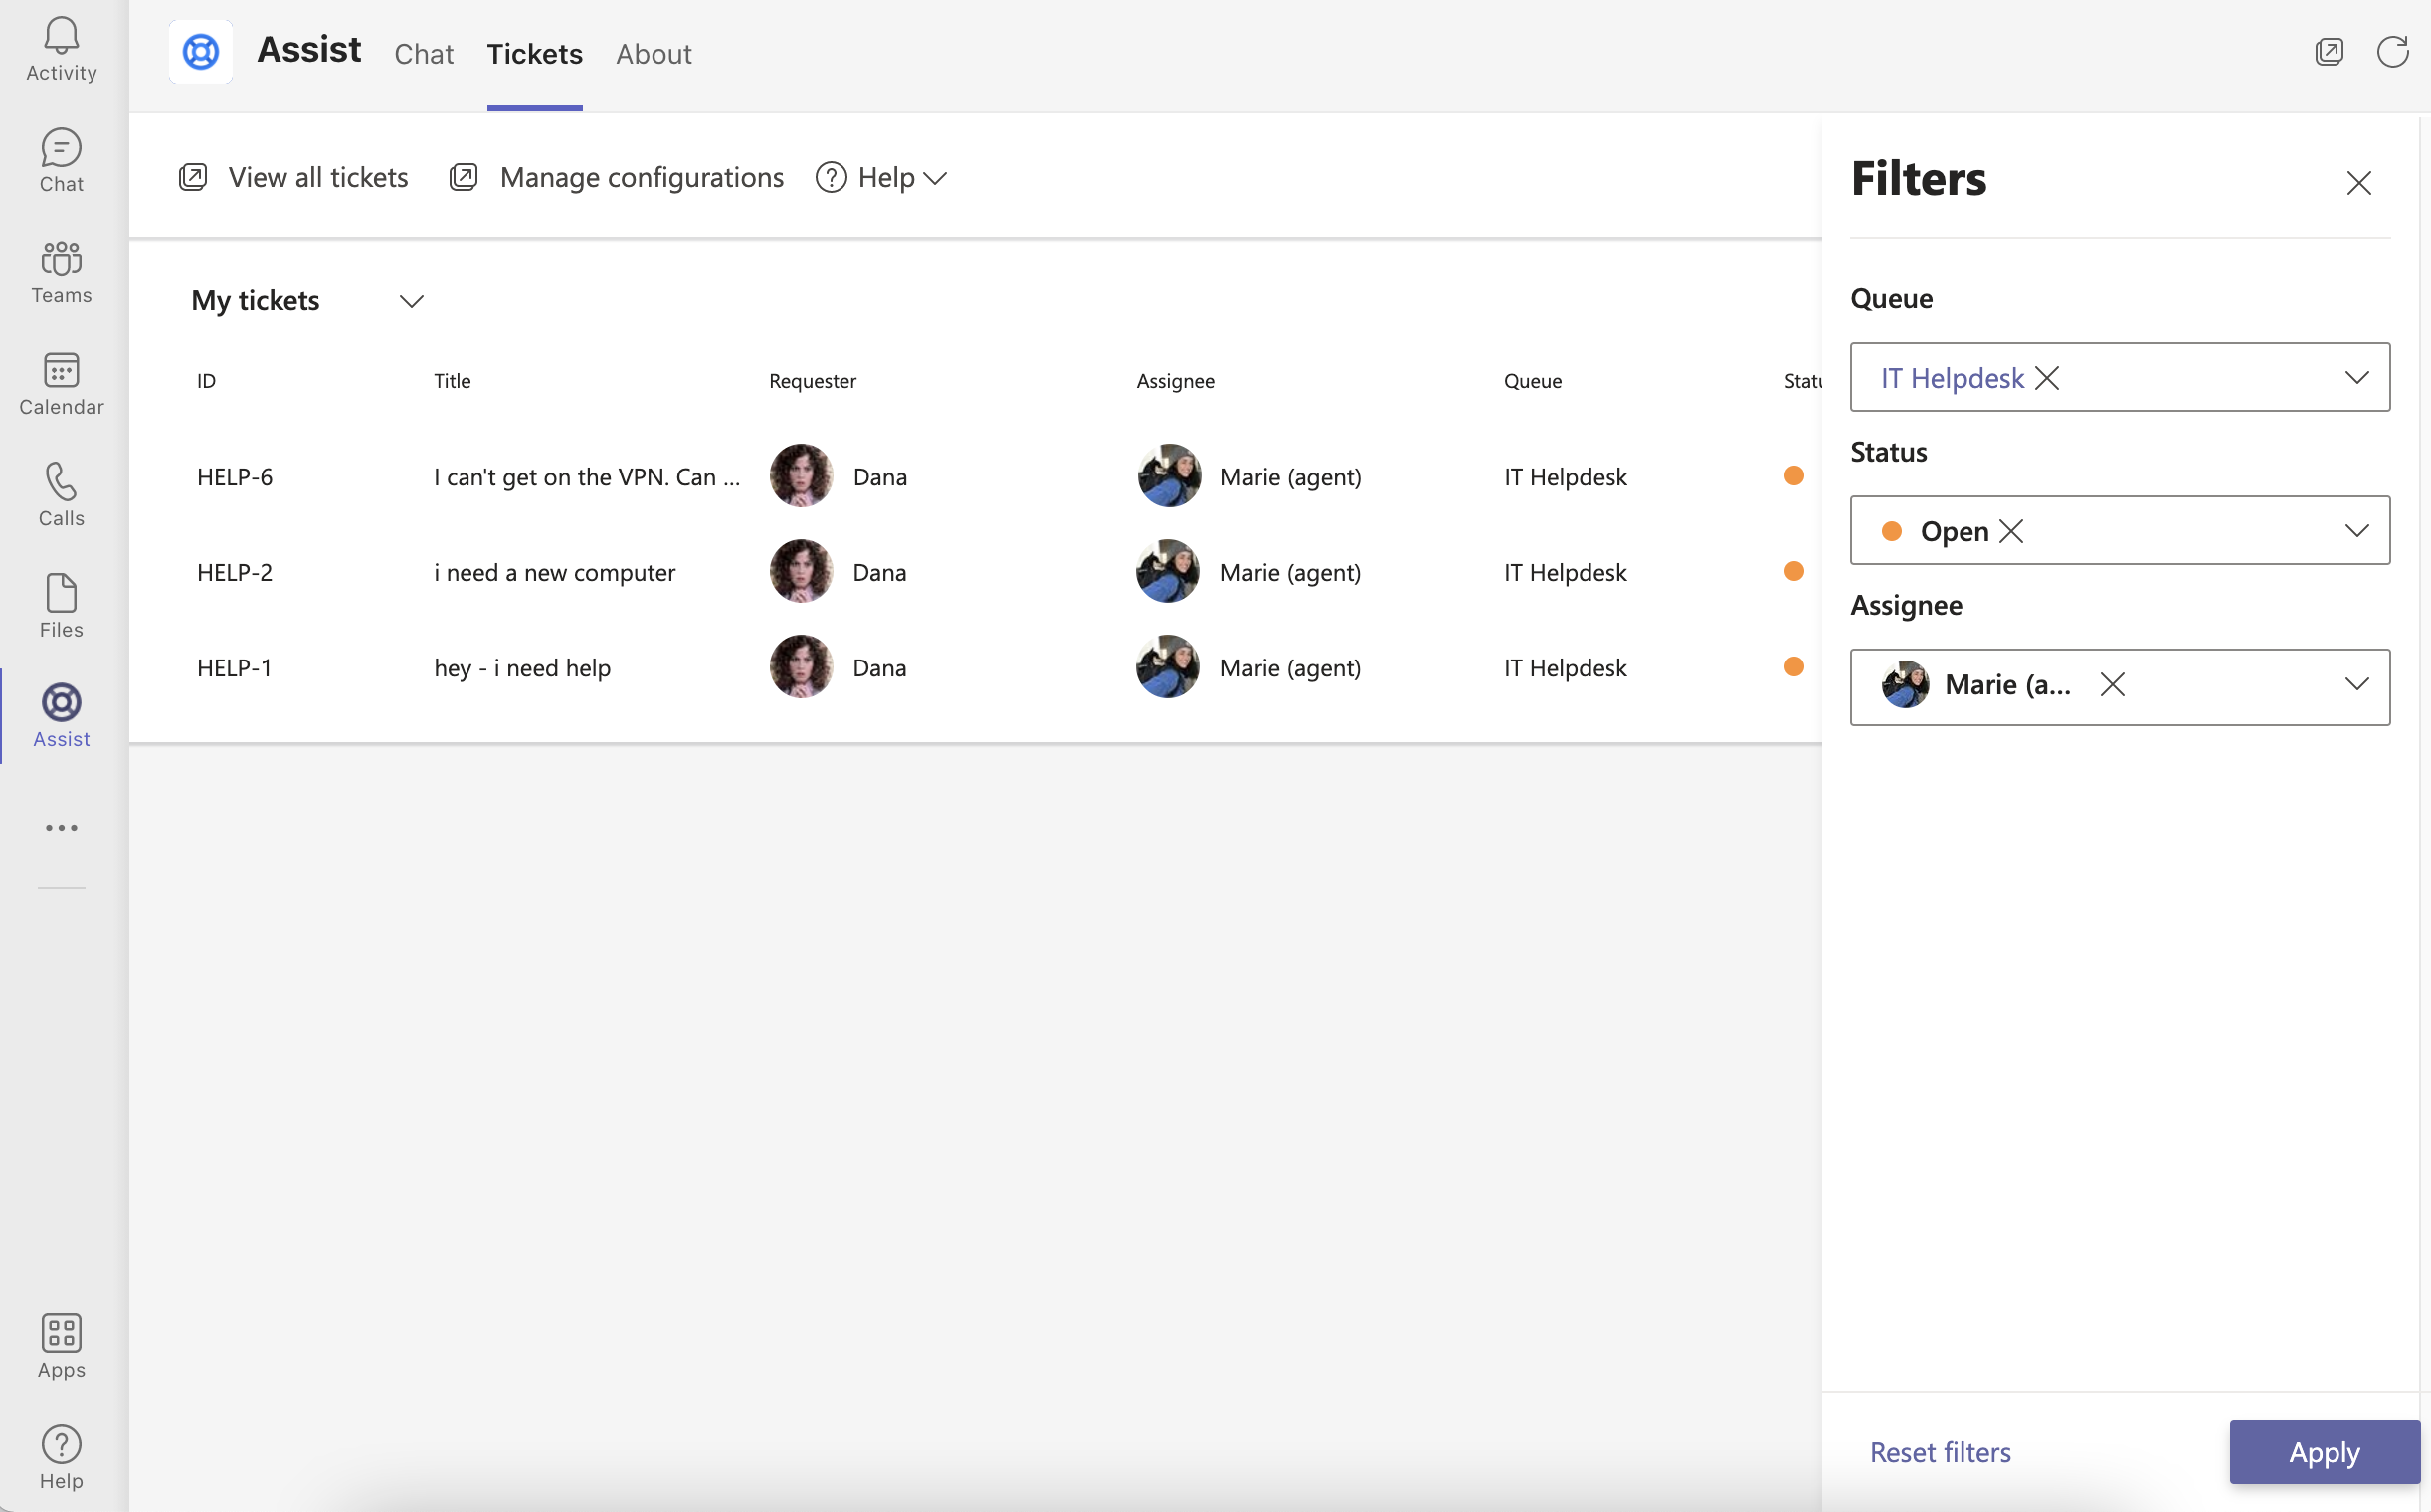
The filters are multi-select. After selecting, click Apply at the bottom of the sidebar to update the ticket list view based on the selected filters. At the bottom of the sidebar, click Reset to remove all filters and return to the default Ticket List view.
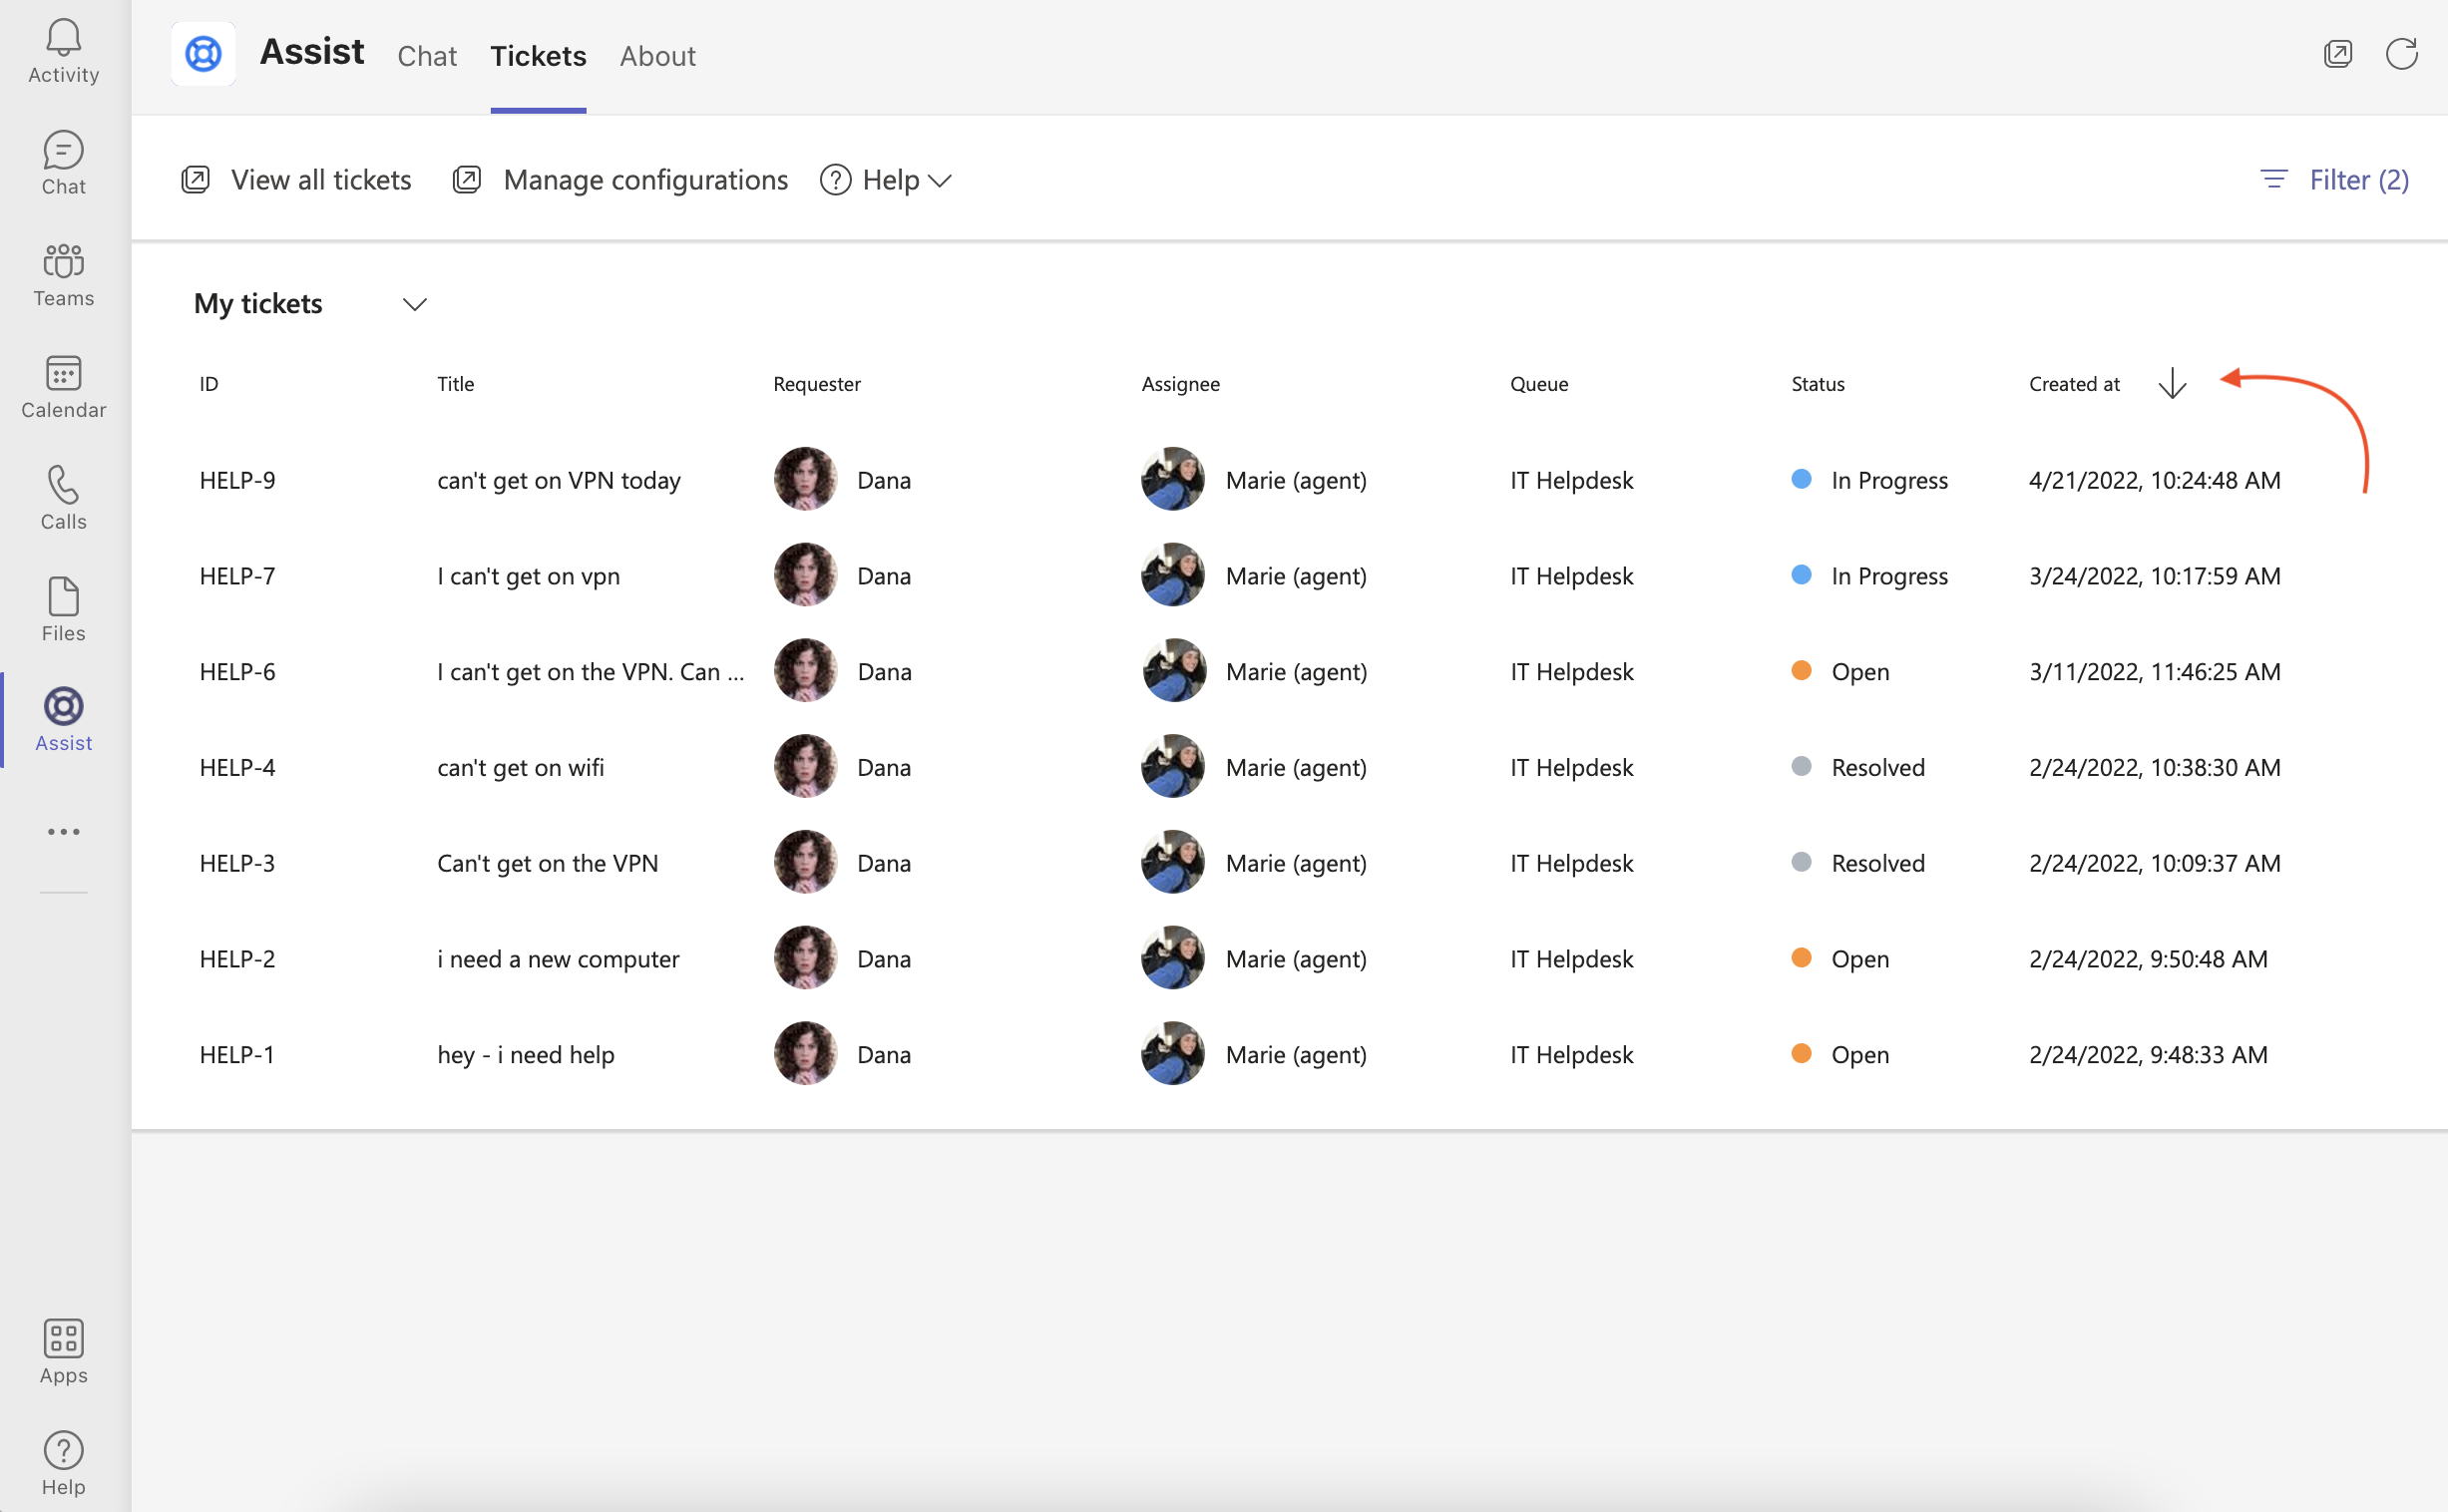
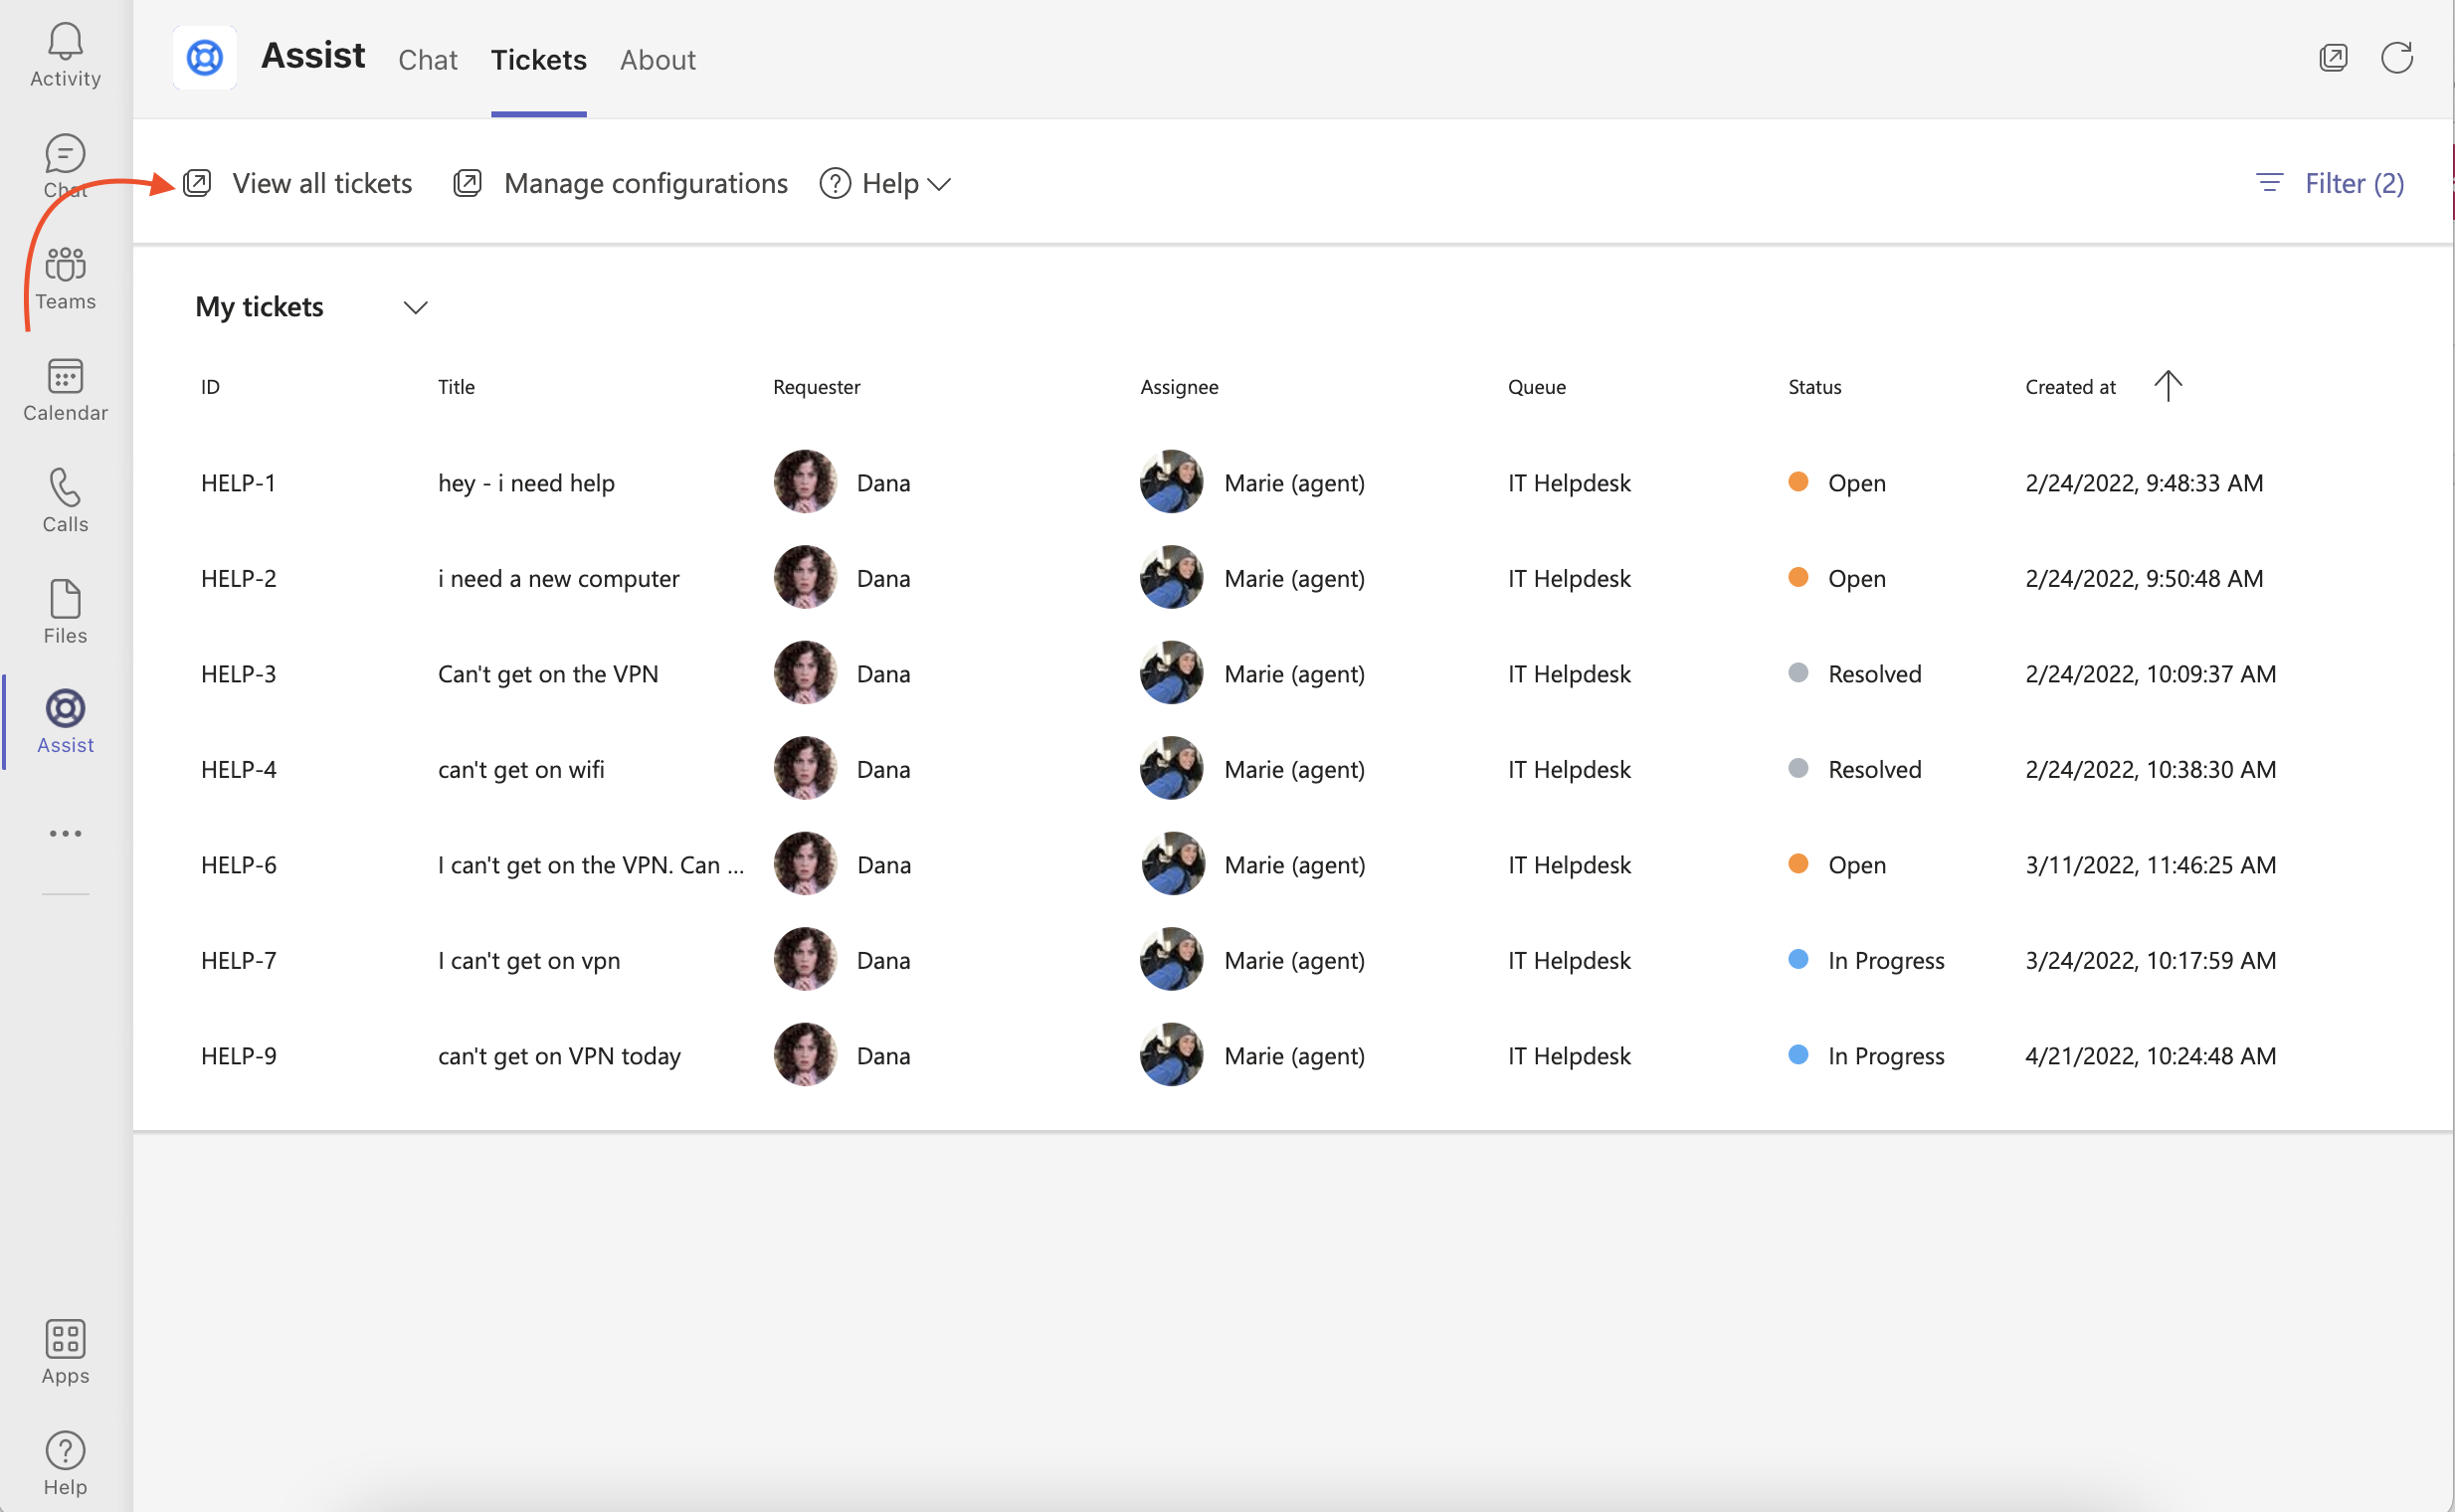
Tickets can also be sorted in either ascending or descending direction by the date they were created. To change this sort direction, click the Created At column on the far right.
Navigation & Configuration
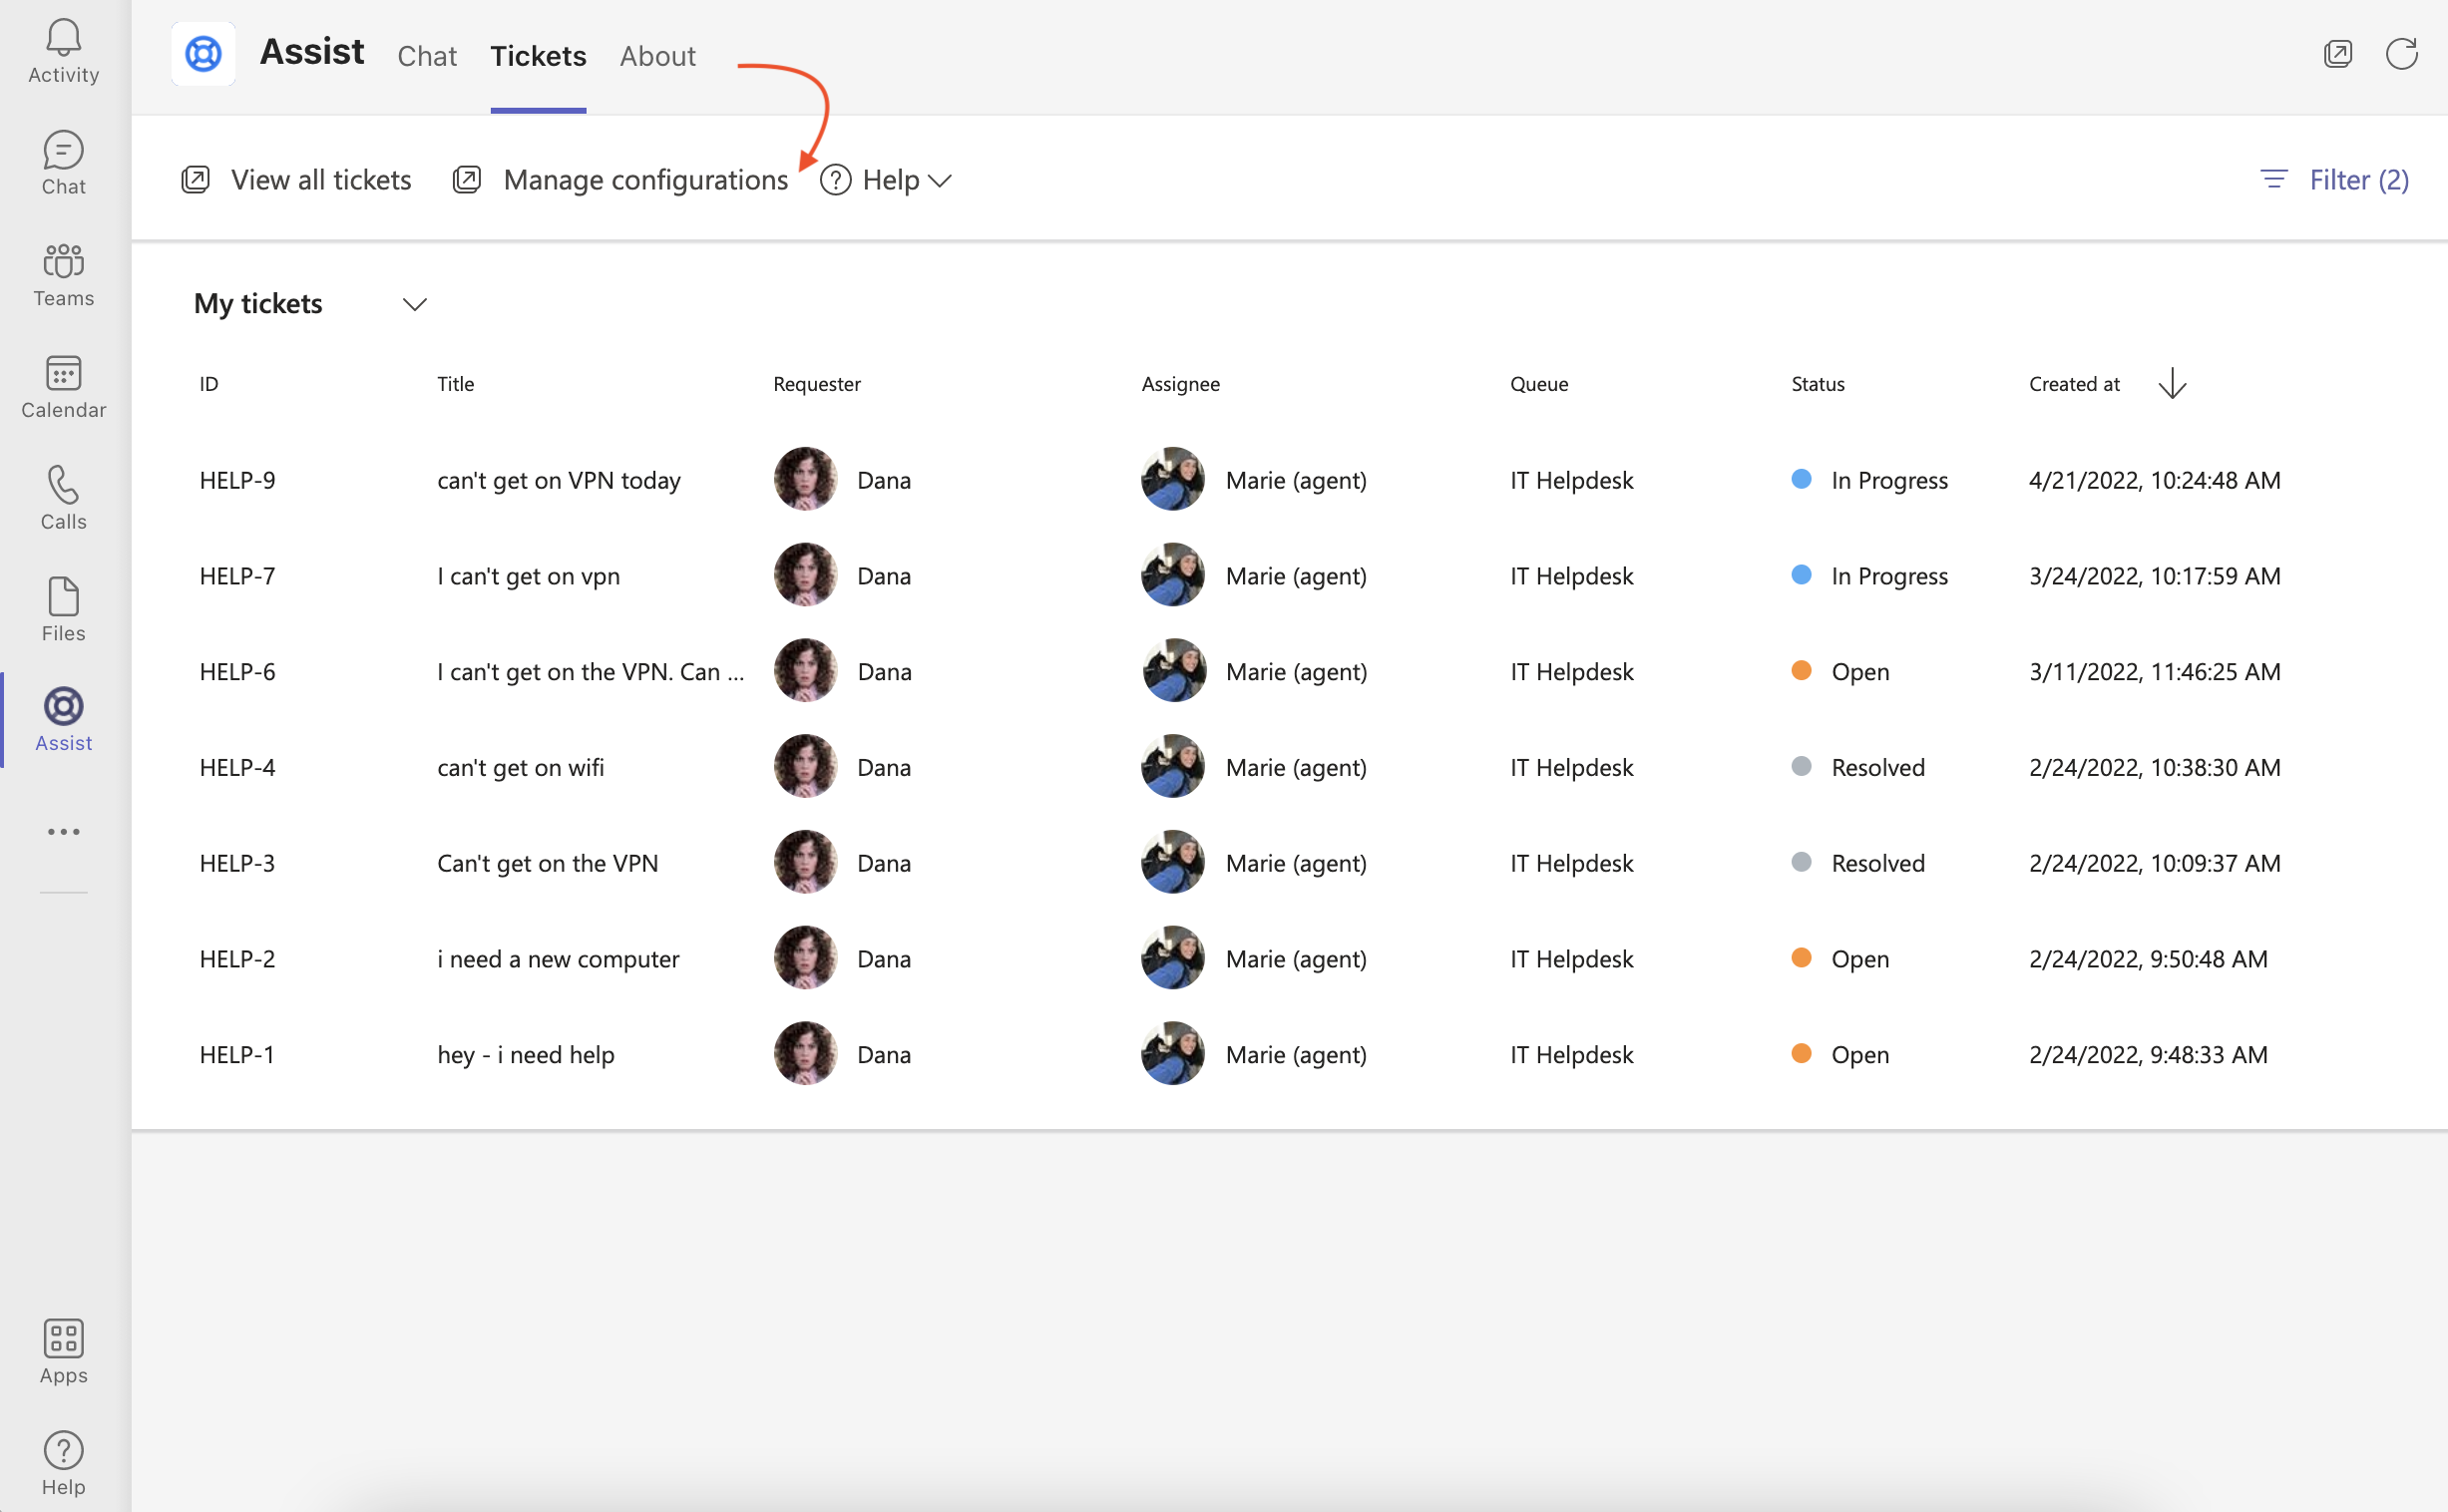
To view all tickets from within the Halp Web, click the View all tickets button in the top left of the Tab.
Admins will see another link for Manage configurations to open the Halp settings page where they can configure Queues, Recipes, Forms and more.
My Requests
When viewing My Requests, Agents and Admins will see tickets they have submitted/are the Requester on and tickets they have been added as a Follower to. The My Requests view has a more limited functionality than the My Tickets view for Agents and Admins and mirrors the functionality that End users have in their My Requests view.
See Ticket Details section below for more on the functionality.
For End Users
🆕 End users in Assist (meaning the user is neither an Admin nor Agent) will now see a new interface when they navigate to the Tickets tab the Assist app in Teams. When viewing the Tickets tab, they will see tickets they have submitted/are the Requester on and tickets they have been added as a Follower to.

Ticket Details
To view the ticket details, End users can click on any row to open a sidebar.
The details surfaced in the sidebar include:
- Ticket number/ID
- Queue
- Title/Summary
- Status
- Requester
- Assignee
- Creation timestamp
- Last updated timestamp
- Form fields (fields from the user submitted form)
Tickets can also be sorted in either ascending or descending direction by the date they were created. To change this sort direction, click the Created At column on the far right.
Troubleshooting
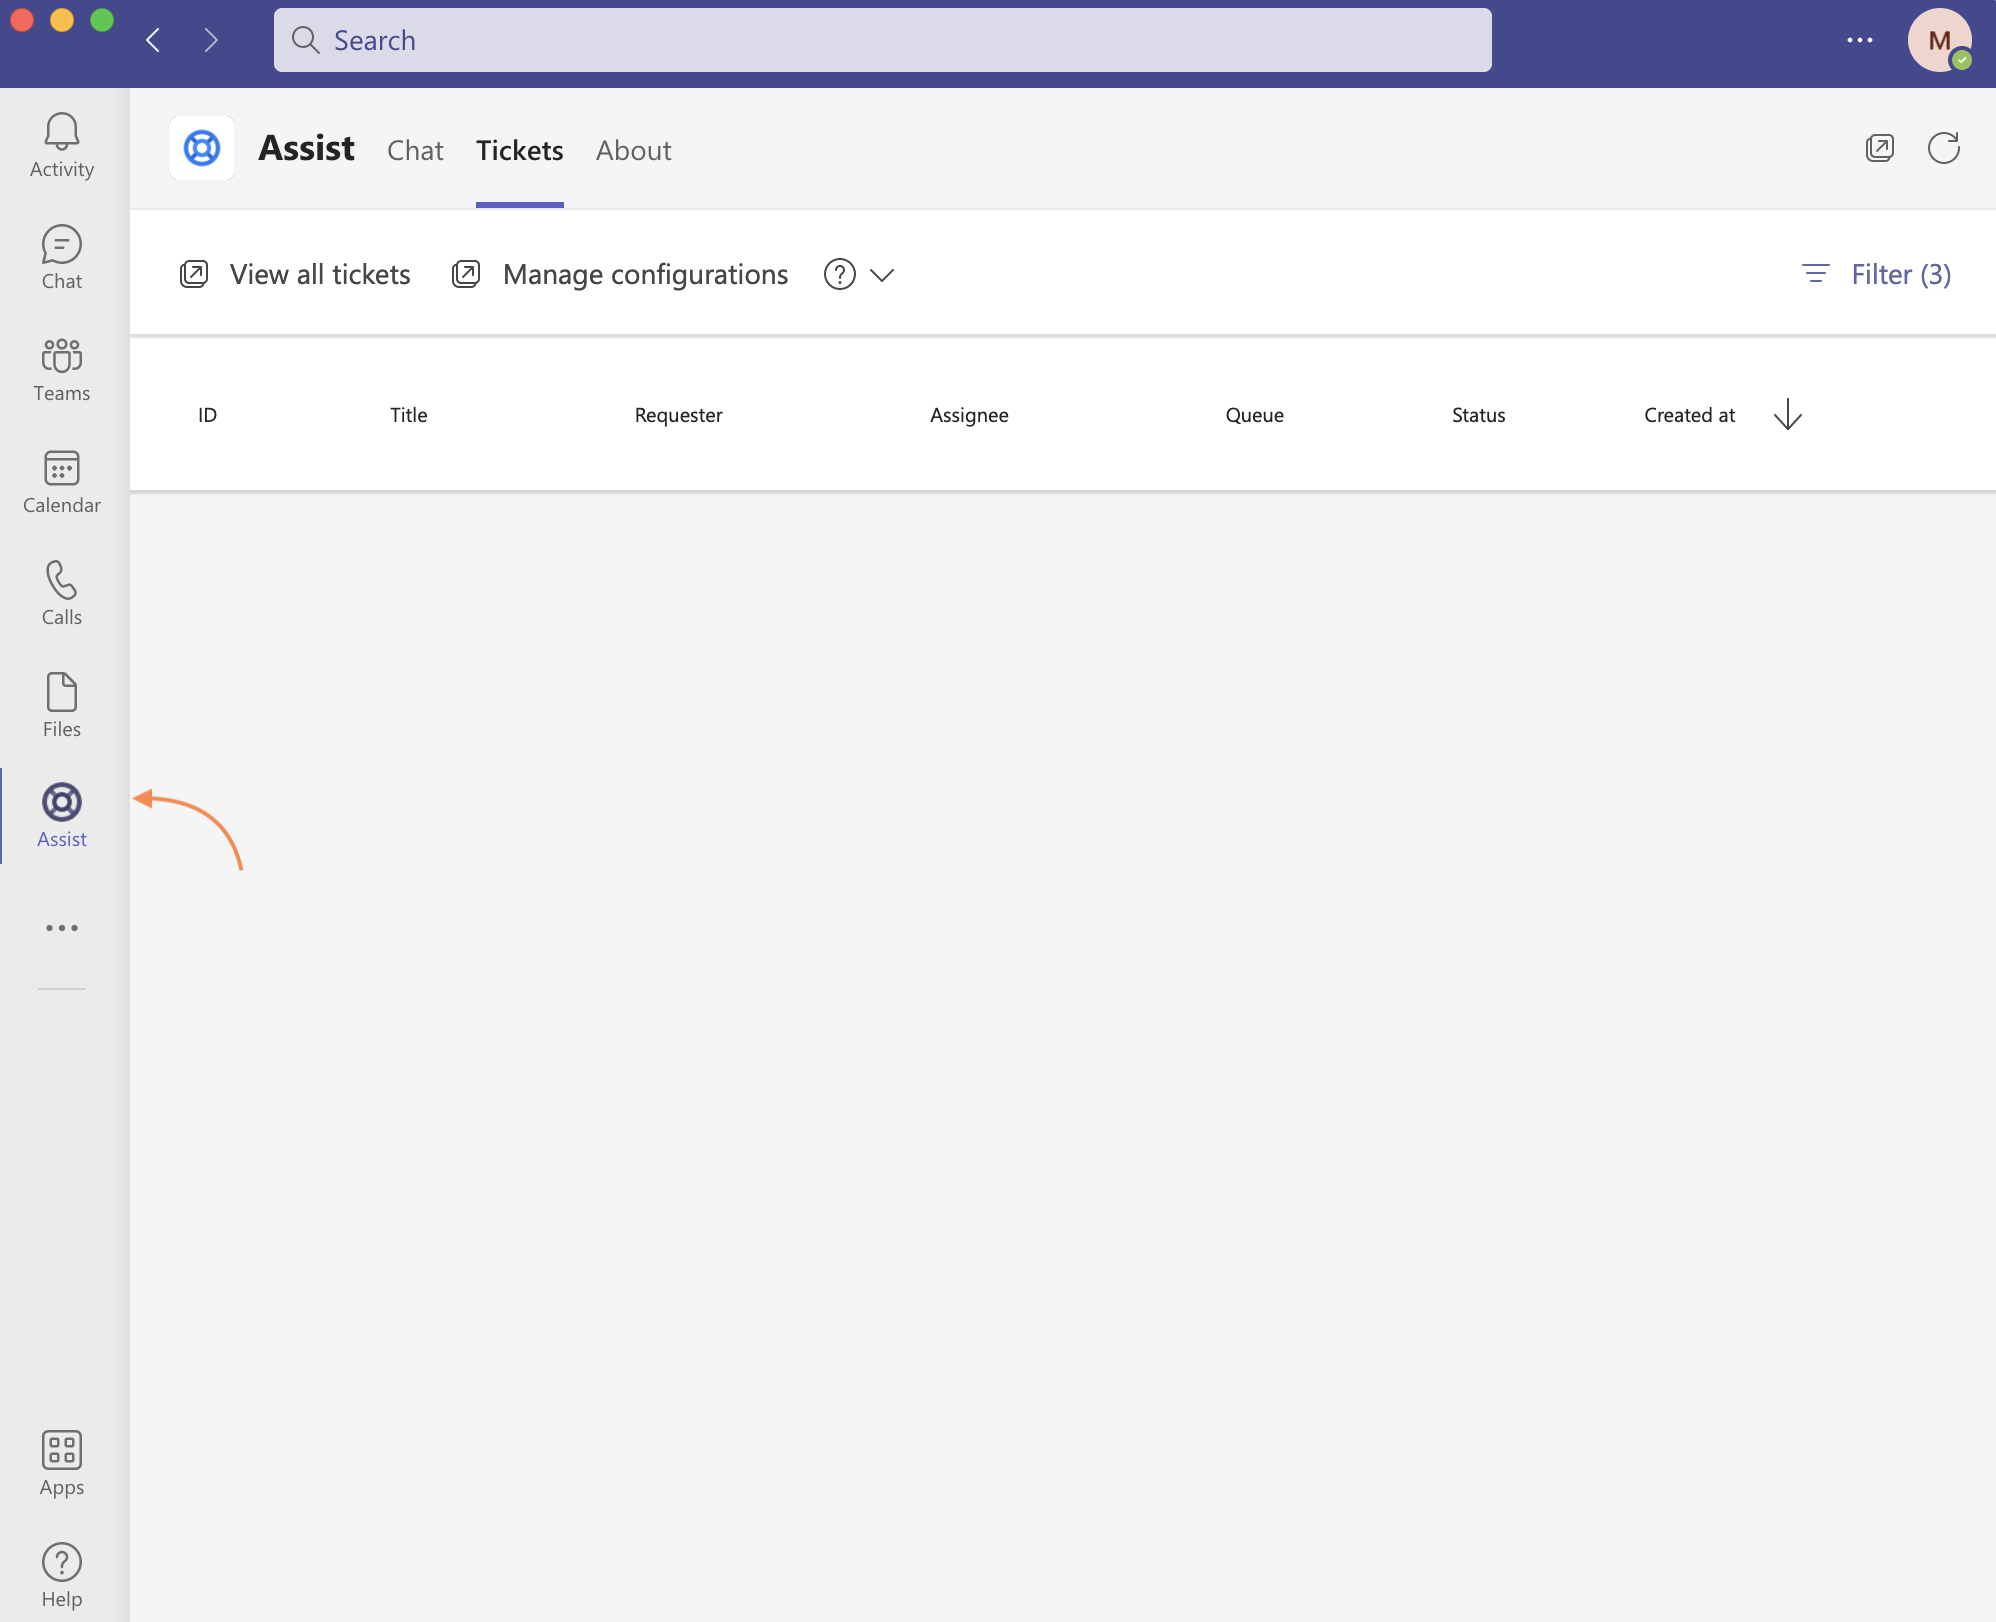
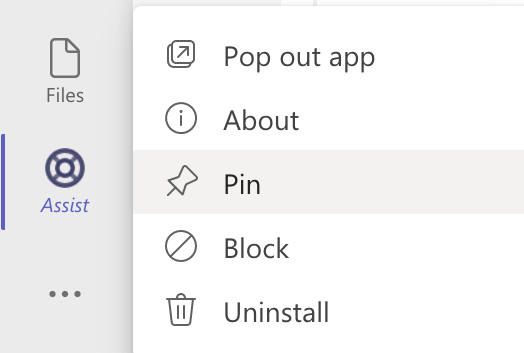
I am not seeing the Assist app in the left side navigation bar
Only your "pinned" apps will automatically appear in the left side navigation bar. If you're not seeing the Assist app there, click on the three dots at the bottom of the list. That will open a window where you can search for Assist.

Once you've found the Assist app, you can click on it to open it. However, as soon as you leave the app, it will disappear from your left nav bar again. For easier access, we recommend "pinning" the Halp app. To do this,
- Once you've opened the Assist app, right click on the Assist app icon in the left navigation bar
- Select Pin to keep the Assist app one-click away at all times (Note: You can right click to unpin it later)
I've opened the Assist app, but am not seeing the Tickets Tab
Once you've selected the Assist app, to see the Tab, select the Tickets tab in the top nav bar.
If you do not see the above tab present (and are only seeing the Chat and About tabs), it likely means you have an outdated version of Assist installed.
To fix this, follow these steps:
- Click on Apps in the bottom left to open the App Source store
- Search for Assist, and select it
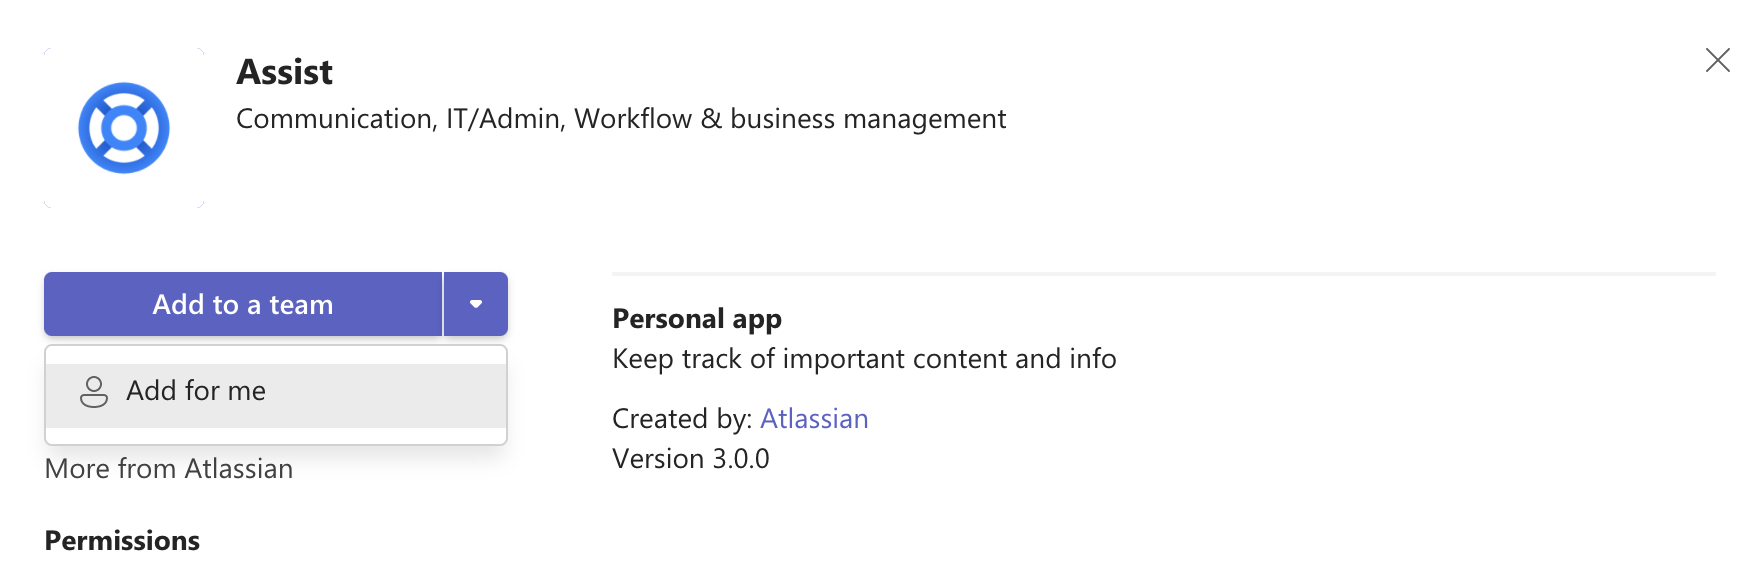
- In the app description, check to make sure it shows version 2.2.2 or higher.
- If it does not, contact support
- If it does, install the Assist personal app by clicking on the blue drop down arrow, then selecting Add for me