Set up a Queue in Slack
 Updated
by
Jensen
Updated
by
Jensen
To create a queue, you first need to create an agent channel (formerly triage channel) in Slack.
Create an agent channel (formerly triage channel)
- Naming conventions for triage channels are helpful — consider using something similar across all triage channels, like "[Team Name] - Triage"
- A Triage Channel should always be private - membership of the channel in Slack is how Halp determines who is an Agent
- Once an Admin finishes configuring the Triage Channel, members of the Triage Channel will become Halp Agents. This will affect your billing.
- If a user is already a member of an existing Triage Channel, and therefore already a Halp Agent, you will not be double charged for them.
To set up a triage channel, a Halp Admin must first add the Assist app to a private channel in Slack.
- Create a new private channel in Slack.
- Type
/addand enter. - Search for "Assist" in Slack app directory and select Add.
- Assist will ask you how you want to use the channel. Select Agent channel.
- You'll receive a message telling you to go to Halp web to create the queue. Go to Halp web, then settings (the gear icon), then Queues.
- Select Create then follow the prompts. Use the private Slack channel you created in step 1.
Voilà! You've set up your triage channel (where agents will work on tickets) and created your queue 🥳. Assist will then send you a welcome message in the triage channel with a link to jump into your queue settings on Halp Web.
Queue settings
When you select Queue settings, you'll be brought to the Halp web app. There, Admins can view or edit the following Queue-level information:
- Configurations (edit)
- Agents (view)
- Auto-responses (edit)
- Fields (edit)
- Forms (edit)
- Statuses (edit)
- SLAs (edit)
- Request Channels (edit)
- Routing Recipes (edit)
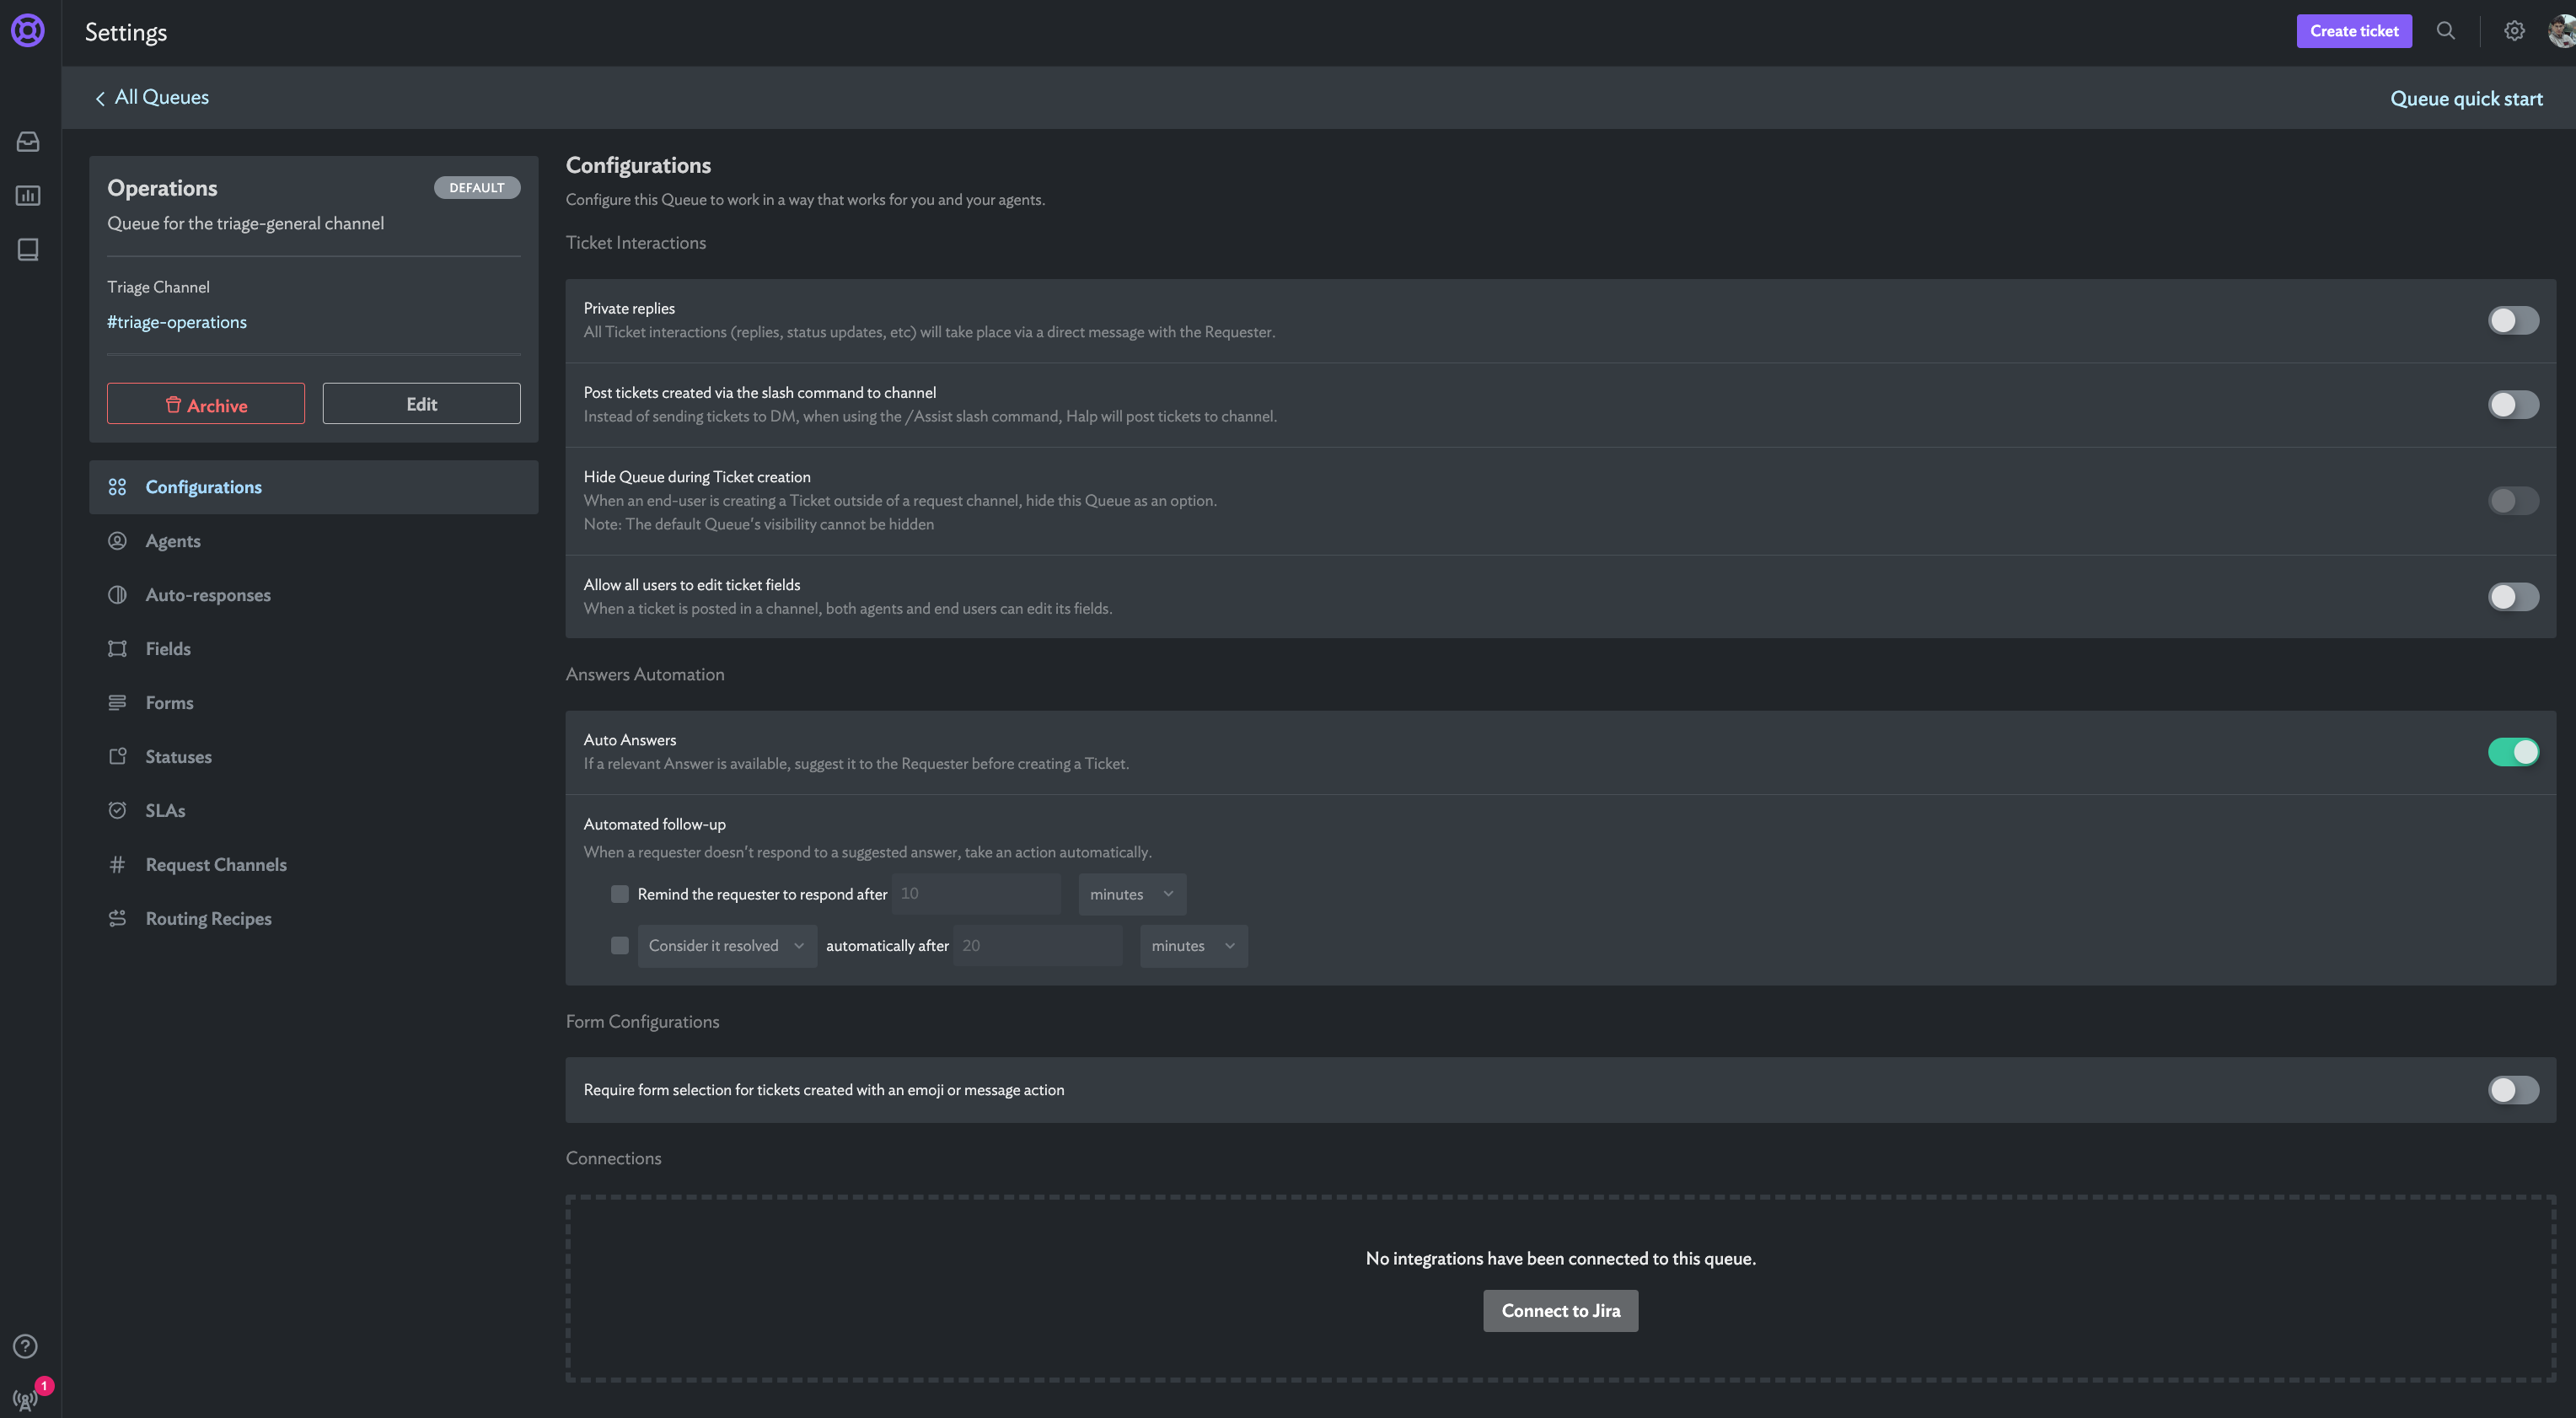
Queue configurations
There are a number of queue-level features that you can toggle on/off in the queue settings.
Ticket interactions
- Private replies
For queues with sensitive tickets (like HR or Legal), this feature allows you to change the behavior when tickets are created in a public channel.- When disabled — default for all queue types, except HR — tickets created in request channels for the queue will be posted publicly to the request channel and all public comments will post in the ticket thread and will be visible to all Slack users in the request channel.
- When enabled, all conversation on tickets in the queue will be between the requester’s DM with the Halp bot, Assist. This ensures that all conversation between the agent and the requester stays private. Tickets created via the Slack slash command (
/helpdesk) will always post to the requester's DM with Assist. This is to ensure that privacy takes priority in a sensitive queue and no ticket information will accidentally leak into a public-facing channel.
- Post tickets created via the slash command to channel
Instead of sending tickets to the requester's DM with Assist, when using the/assist,/helpdesk, or/supportslash commands, Assist will post tickets to request channel.- When disabled [default], tickets created with the Slack slash commands will post to the requester's DM with the bot.
- When enabled, tickets created via the Slack slash commands will post publicly in the request channel
- Hide queue during ticket creation
Users can create tickets in places that are not tied to a specific queue. This happens when a user creates a ticket using App home, DMs, and bot-less channels. When this happens, Assist will suggest a list of all queues for the ticket to be created in.- When disabled (default), the queue will appear in the list of suggested queues to create a ticket in
- When enabled, the queue will not appear in the list of suggested queues to create a ticket in
- Allow all users to edit ticket fieldsWe currently do no support ticket field visibility and editability for tickets created in Zendesk where the user fills out a form. We support ticket field visibility and editability for tickets created in Slack, Halp Web, and Jira where the user fills out a form. Those tickets include either a View or Edit button, depending on if the setting is enabled or disabled.When a ticket is created in Slack or Halp Web using a form, the requester will see a View or Edit button on the ticket that allows them to either view or edit the fields they submitted in the form. The pop-up modal also includes the agent assigned to the ticket (or if it is unassigned) and any followers that have been added to the ticket.
- When disabled [default], tickets created in the queue will include a View button, allowing the requester to view any of the fields they input when submitting their request.
- When enabled, tickets created in the queue will include an Edit button, allowing the requester to revise/edit any of the fields they input when submitting their request.
Tips on View/Edit button visibility
- If the ticket was created via a request channel, all channel members will also see either the View or Edit edit button and will be able to take the same actions as the requester
- If you wish to only show the View or Edit button to the ticket requester & followers, we recommend also enabling Private replies
Form configurations
- Form requirement
Once the ticket creation emoji (🎫 ) has been added to a comment, Assist will whisper to the Slack user who added the emoji and prompt them to select a form from the Queue's available forms in order to create a ticket.- When enabled, the Slack user (ideally, the Requester) needs to select and complete a form in order to create a ticket. This is a great setting if you would like to get additional information upfront about the ticket or if you have several, discrete request types for your team.
- When disabled, any Slack user in the Request Channel can create a ticket by adding the ticket creation emoji to any posted comment in the channel.
Connections
- Connect to Jira
Connect your Halp Queue to a Jira Project. Learn more about connecting Jira projects.
Agents
In your queue settings, you can view agents who have access to a queue. Agents are the members of a channel that is designated as the triage channel for a particular queue. You may add and remove agents directly from Slack. Learn more about user roles.
Auto-assign
Auto-assign automatically assigns tickets to agents on a rotating basis, eliminating the need to do it manually. To get started, turn on this setting and select the agents you'd like to include in the rotation.
How auto-assignment works
- When enabled, tickets assign automatically to the next agent in the rotation.
- This feature only takes into account unassigned tickets. It won't assign tickets that already belong to an agent.
- Auto-assignment runs after any recipes or Zendesk workflows you may have set up already.
Auto-responses
- To customize the Slack bot, you need to be a Halp Admin
- You must be on a Halp Premium Plan or Enterprise Plan to customize your Slack bot
- Navigate Queues -> [Select your queue] -> Auto-responses
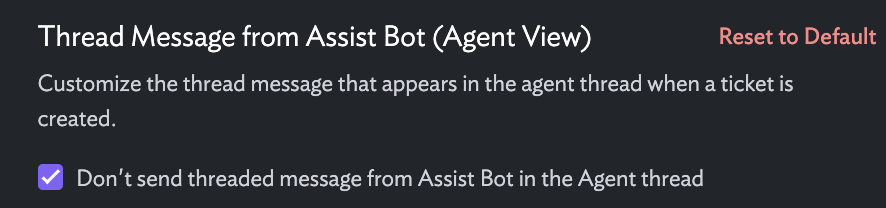
- Under the Messaging section, you’ll see 3 places you can edit bot messages:
- Thread Message from Assist Bot (Agent View)
- Thread Message from Assist Bot (End User View)
- Thread Message from Assist Bot (Private Replies)
- Clicking out of the dialog box will save the settings. You can click Reset to Default at any time to return the messaging to Halp's default messaging
- Two of the messages can be completely turned off. Just check the box Don't send threaded message from Assist Bot in the ... to suppress the message
Fields
Halp has global fields and queue fields.
- Global fields are fields that appear in every queue (i.e. title)
- Queue fields are fields that only appear in their queue.
Note: If you are creating fields to sync with Zendesk, please follow these steps.
Forms
Queues can have an unlimited number of forms. Forms are a collection of global and/or queue fields. You must always have at least 1 form on each queue.
Forms populate in a few places.
- If a ticket is created where a queue is not defined (App home, a Slack channel where Assist has not been added)
- In channels tied to queues that have "Form Configuration" is enabled
- When the slash commands (
/assist,/helpdesk, or/support) are used
Creating a Form
- Navigate to Settings -> Queues -> Forms
- Select Create
- Add any queue fields and global fields you would like to include on a form (you can mark individual fields as required).
Statuses
Ticket statuses live at the queue level and can be edited from the queue settings page. There are three status categories:
- Open: Tickets that are created and/or waiting for support
- In progress: Tickets that are pending or awaiting customer response
- Done: Tickets that are closed or completed
When a new queue is created, the following default status settings are in place:
- Three default statuses available (one per category): Open / Pending / Closed. You can add additional statuses to those categories, but you must keep at least one in the
OpenandDonecategories. - When a ticket is created, it will be assigned the default status in the
Opencategory. - When a ticket moves to any status in the
Donecategory, Assist will automatically collapse the ticket in the Triage Channel in Slack. If you click the “Close Ticket” button in Slack, the ticket status will change to the defaultDonestatus. - The Status color will be grey. You can change the color of each status to better reflect your team's preferences.
Note: If you are connecting tickets in this queue to Zendesk, make sure the statuses match exactly.
SLAs
An SLA (Service Level Agreement) is a rule that you can set for your teams to ensure tickets are being handled in a timely manner. Halp SLAs can track when these agreements are breached, and send a message to the ticket and triage channel before it breaches. Learn more about SLAs.
Request channels
Request channels are Slack channels where requesters can go to make a ticket for a specific team of agents. Any tickets created from a request channel can be directed to a preferred queue by default, and you can turn any new or existing Slack channel into a request channel. Learn more about request channels.
Routing recipes
Routing recipes are recipes that send tickets into a queue. These recipes can overwrite other queue-based triggers. Learn more about recipes.