How to Edit Tickets Inside of MS Teams
 Updated
by
Brian Feldman
Updated
by
Brian Feldman
Editing Tickets within Teams
Agents can edit certain fields directly within Teams. To do this, select the ticket from the Ticket List view in your Halp tab. You will see the selected ticket's details appear in a right side panel.
From there, Agents can edit the following fields:
- Title: Update the title to provide better clarity at a glance as you or others need to triage & work the ticket, or look it up in the future. Note: Title's currently have a 150 character limit.
- Assignee: Assign or re-assign the ticket to different Agents available on this ticket's queue, ensuring that responsibilities can easily be transferred based on your teams bandwidth or assignment routing rules.
- Status: Quickly update the status as a ticket progresses from Open to In Progress to Done. Select from any of the statuses available on this ticket's queue.
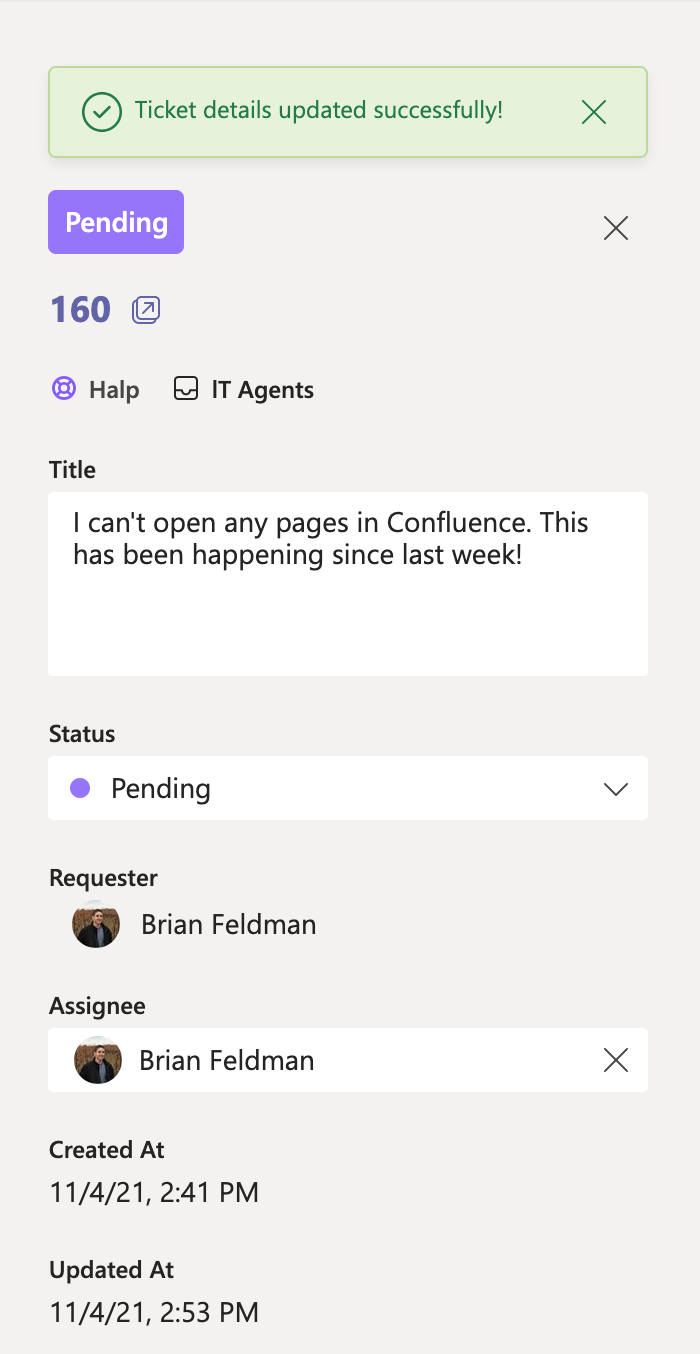
When you've finished updating, at the bottom of the right panel you can click either:
- Discard: To revert your changes.
- Save: To save your changes. Once saved, all changes will be synced across your Halp experience. For example, you’ll notice the updated details will appear in Halp web, on the Ticket’s Card in your Triage Channel, and across any integrations you may have configured.
This is just the start! Keep an eye out for even more fields that will become editable over time, including custom fields! You’ll know if a field is editable because it will have a white background (or light grey in dark mode), as opposed to the static grey background (or dark grey in dark mode).